Close Menu
Aftermarket Garage
    Facebook X (Twitter) Instagram
    Trending
    • Aftermarket Aluminum Water Pump Pulley
    • High Pressure Power Steering Leak Fix on a 2001 Volvo S60 T5
    • Is it really a cold air intake if it’s in the engine bay?
    • Keep your AGM car battery charged
    • How to change the cabin filter on a 2005 Jaguar XJ8 Vanden Plas
    • Jaguar Vanden Plas – Fender bender
    • Jaguar X350 (2005 Vanden Plas) Ground Point Failure and Fix
    • Jaguar X350 XJ8 coolant leak
    Facebook X (Twitter) Tumblr
    Aftermarket Garage
    • Home
    • Maintain
    • Repair
    • Improve
    • Store
      • All Products
      • Top Products
    • Garage
      • BMW
        • 1999 BMW M3 E36
        • E39 BMW M5
      • Honda
        • 2009 Honda Ridgeline RTL
      • Mercedes-Benz
        • 2001 Mercedes-Benz S430
        • 2006 Mercedes-Benz S600 AMG Sport
      • Nissan
        • 1996 Nissan 300ZX 2+2 5 Speed
      • Jaguar
        • 2005 Jaguar XJ8 Vanden Plas
      • Volvo
        • 2001 Volvo S60 2.4t
        • 2001 Volvo S60 T5
    • About
      • Privacy Policy
    Aftermarket Garage
    You are at:Home»Maintenance»Volvo S60 2.4t Throttle Body Cleaning

    Volvo S60 2.4t Throttle Body Cleaning

    2
    By Jason Kent on August 10, 2015 Maintenance

    If you are having issues with a rough idle on your Volvo and you don’t have a record of the throttle body ever being cleaned then this is something you’ll want to consider doing. If there is an inexpensive project like this that I can do that removes grime from where it shouldn’t be and will possibly improve performance then I’m all for it. I did this project on our Volvo S60 last year and there is no doubt that it improved an idle issue that we were having. The car had intermittent problems prior to the cleaning with completely stalling out when we would try to take off from a stop.

    • Products Used
    • Tools Used

    Products Used

    Throttle Body Cleaner

    Scrub brush – You can use an old toothbrush as well.

    Throttle Body Gasket

    Shop Towels

    Optional:

    Automotive Wire Conduit

    Tesa Harness Tape

    Tools Used

    Screwdriver tool – This is a better tool than a ratchet in some situations

    1/4″ U-Joint Socket

    1/4″ Ratchet

    1/4″ Ratchet Extensions

    7mm, 10mm socket

    Torx T25 Bit

    Bent Nose Pliers

    When I did this project I took the pictures just for my own records because I love to see before and after photos of my efforts. If I’d have known I’d later be putting together this post about it then I would have documented the process better with a few more photos. I used basically the same process described in the video at the bottom of this post. The guy in the video does a great job of explaining the removal of not only the throttle body but all the other things you need to remove to get it out for cleaning.

    One thing of note, I had more trouble getting the inlet hose off of the throttle body than he did. With a few curse words and elbow grease I was eventually able to work it back and forth with enough downward pressure to break it free. I’m guessing this is because it had never been removed and after 14 years and 155,000 miles it wasn’t in the mood to go anywhere. It also proved to be a bit of a pain to get back on.

    There were a couple of the 10mm bolts that hold the throttle body in place that were tricky to remove from above so I ended up getting those from underneath. I used the 1/4″ ratchet with the extensions to reach.

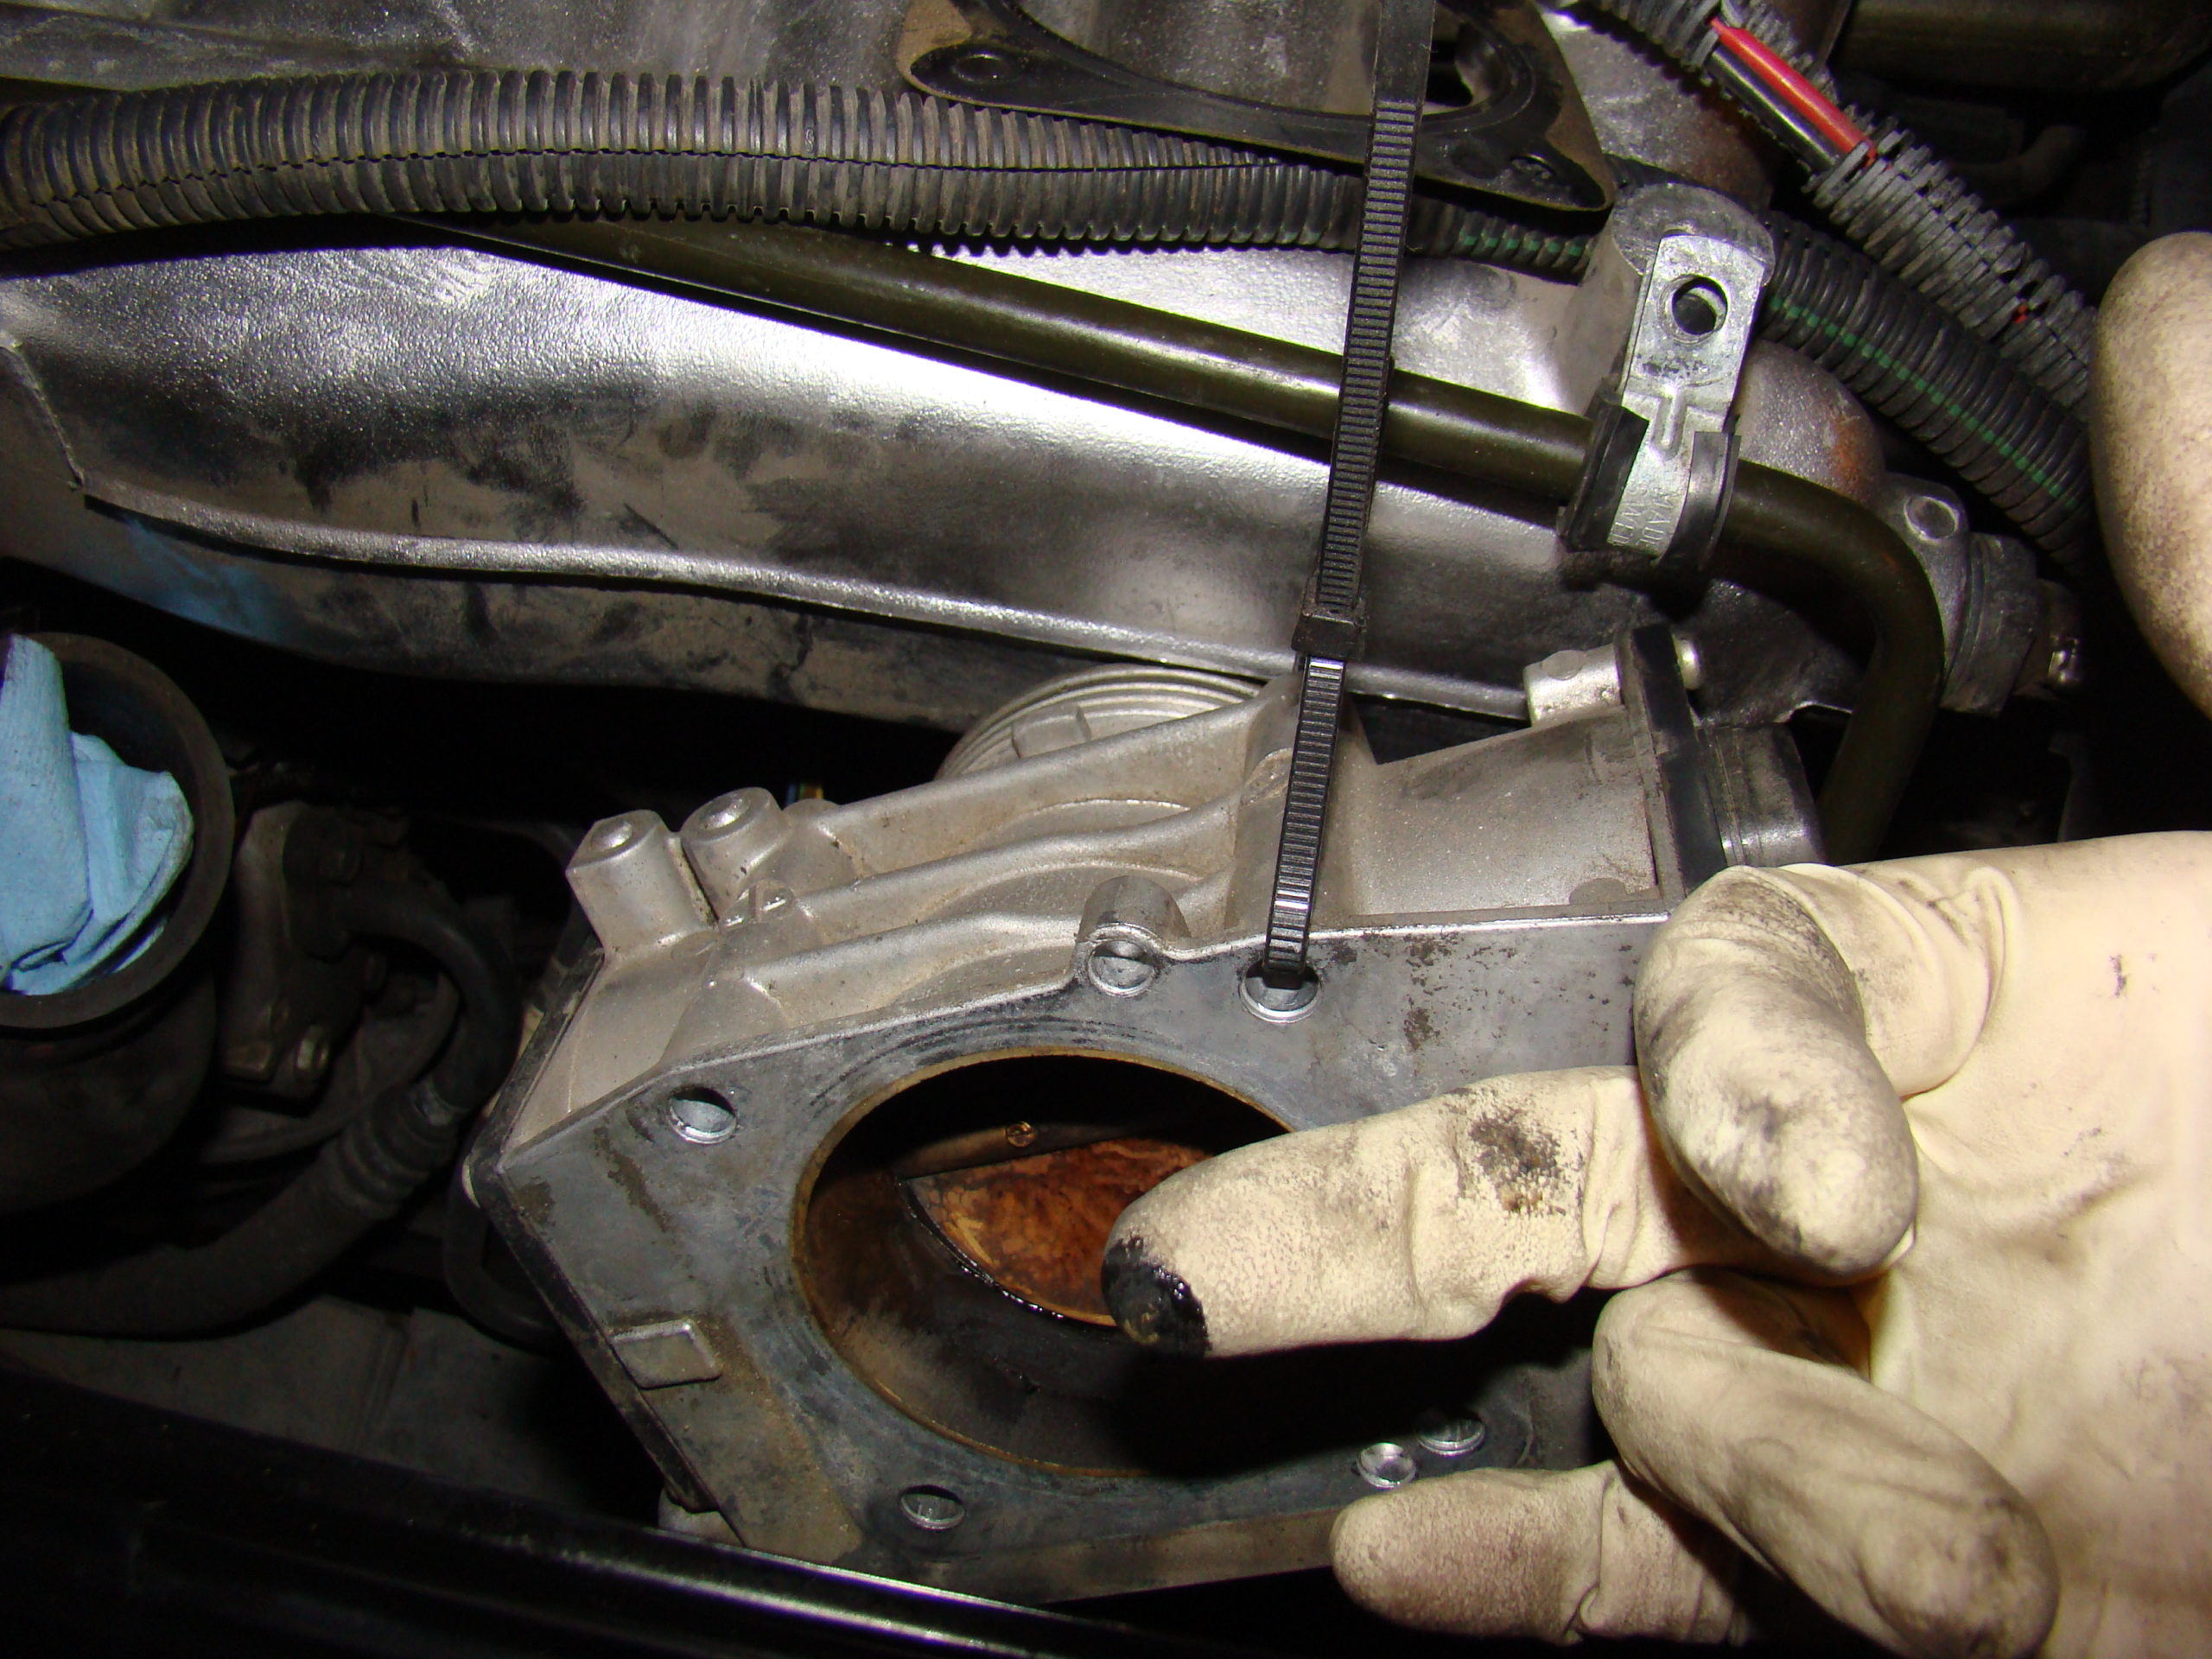
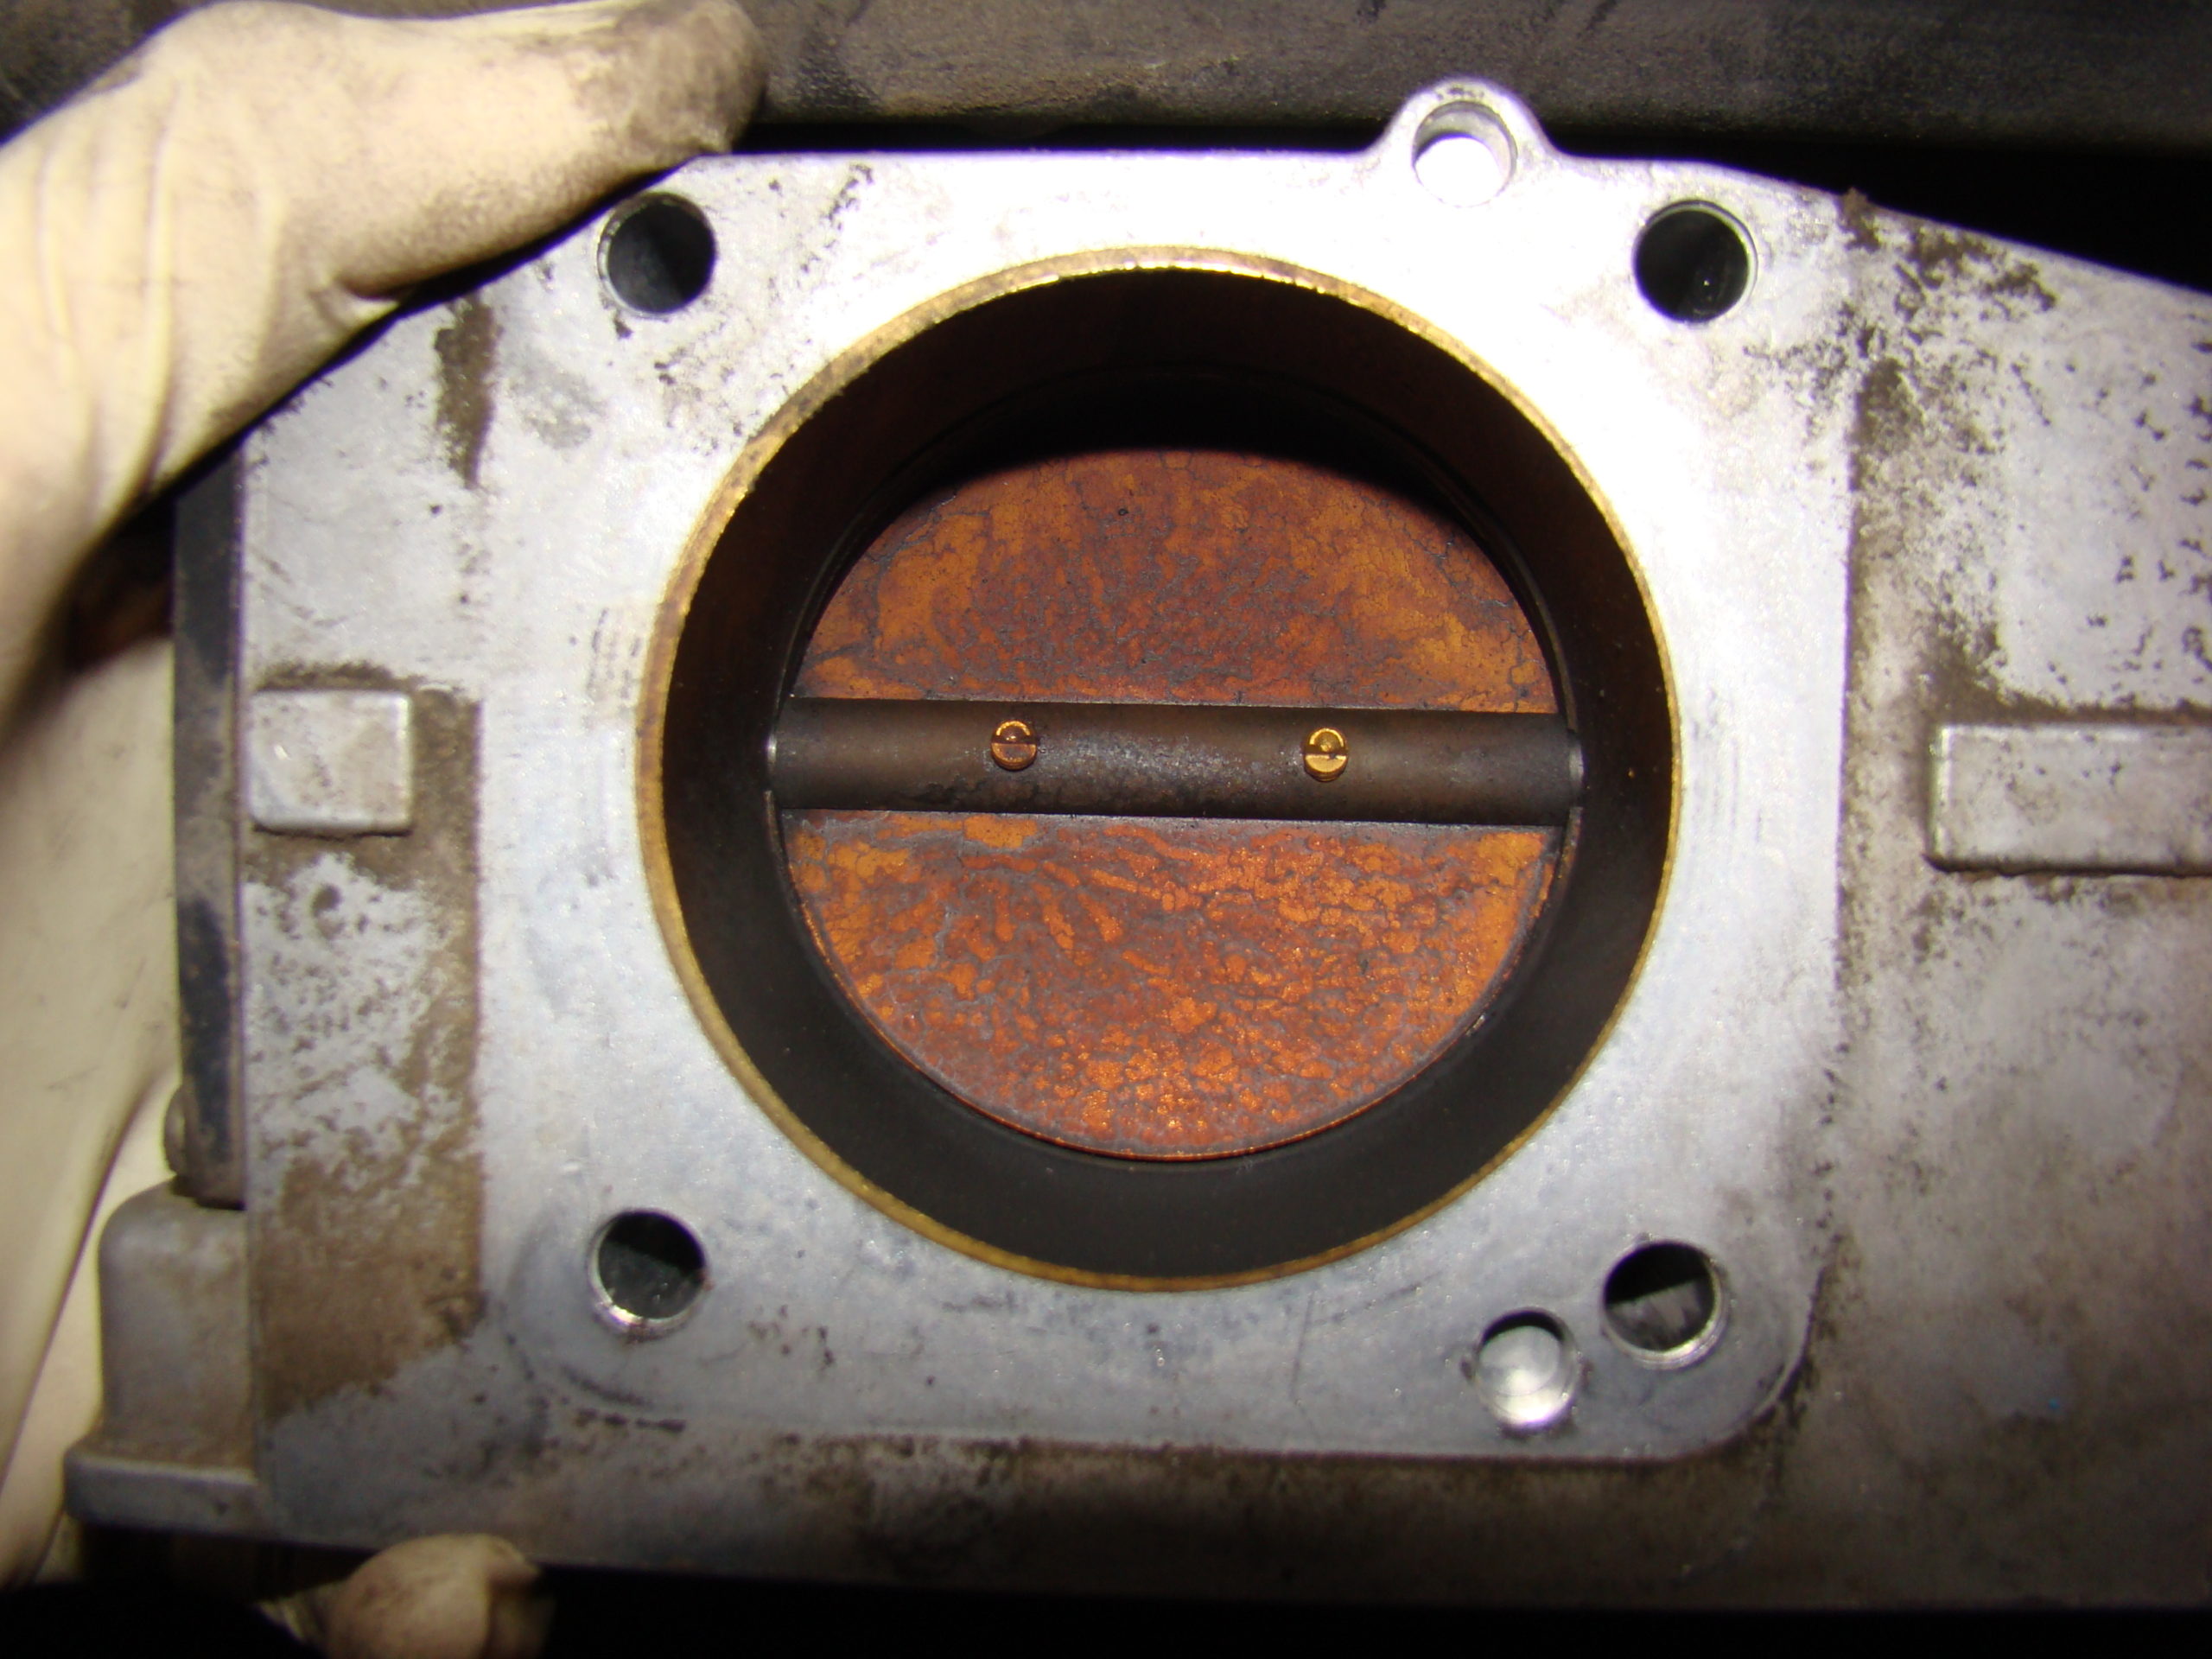
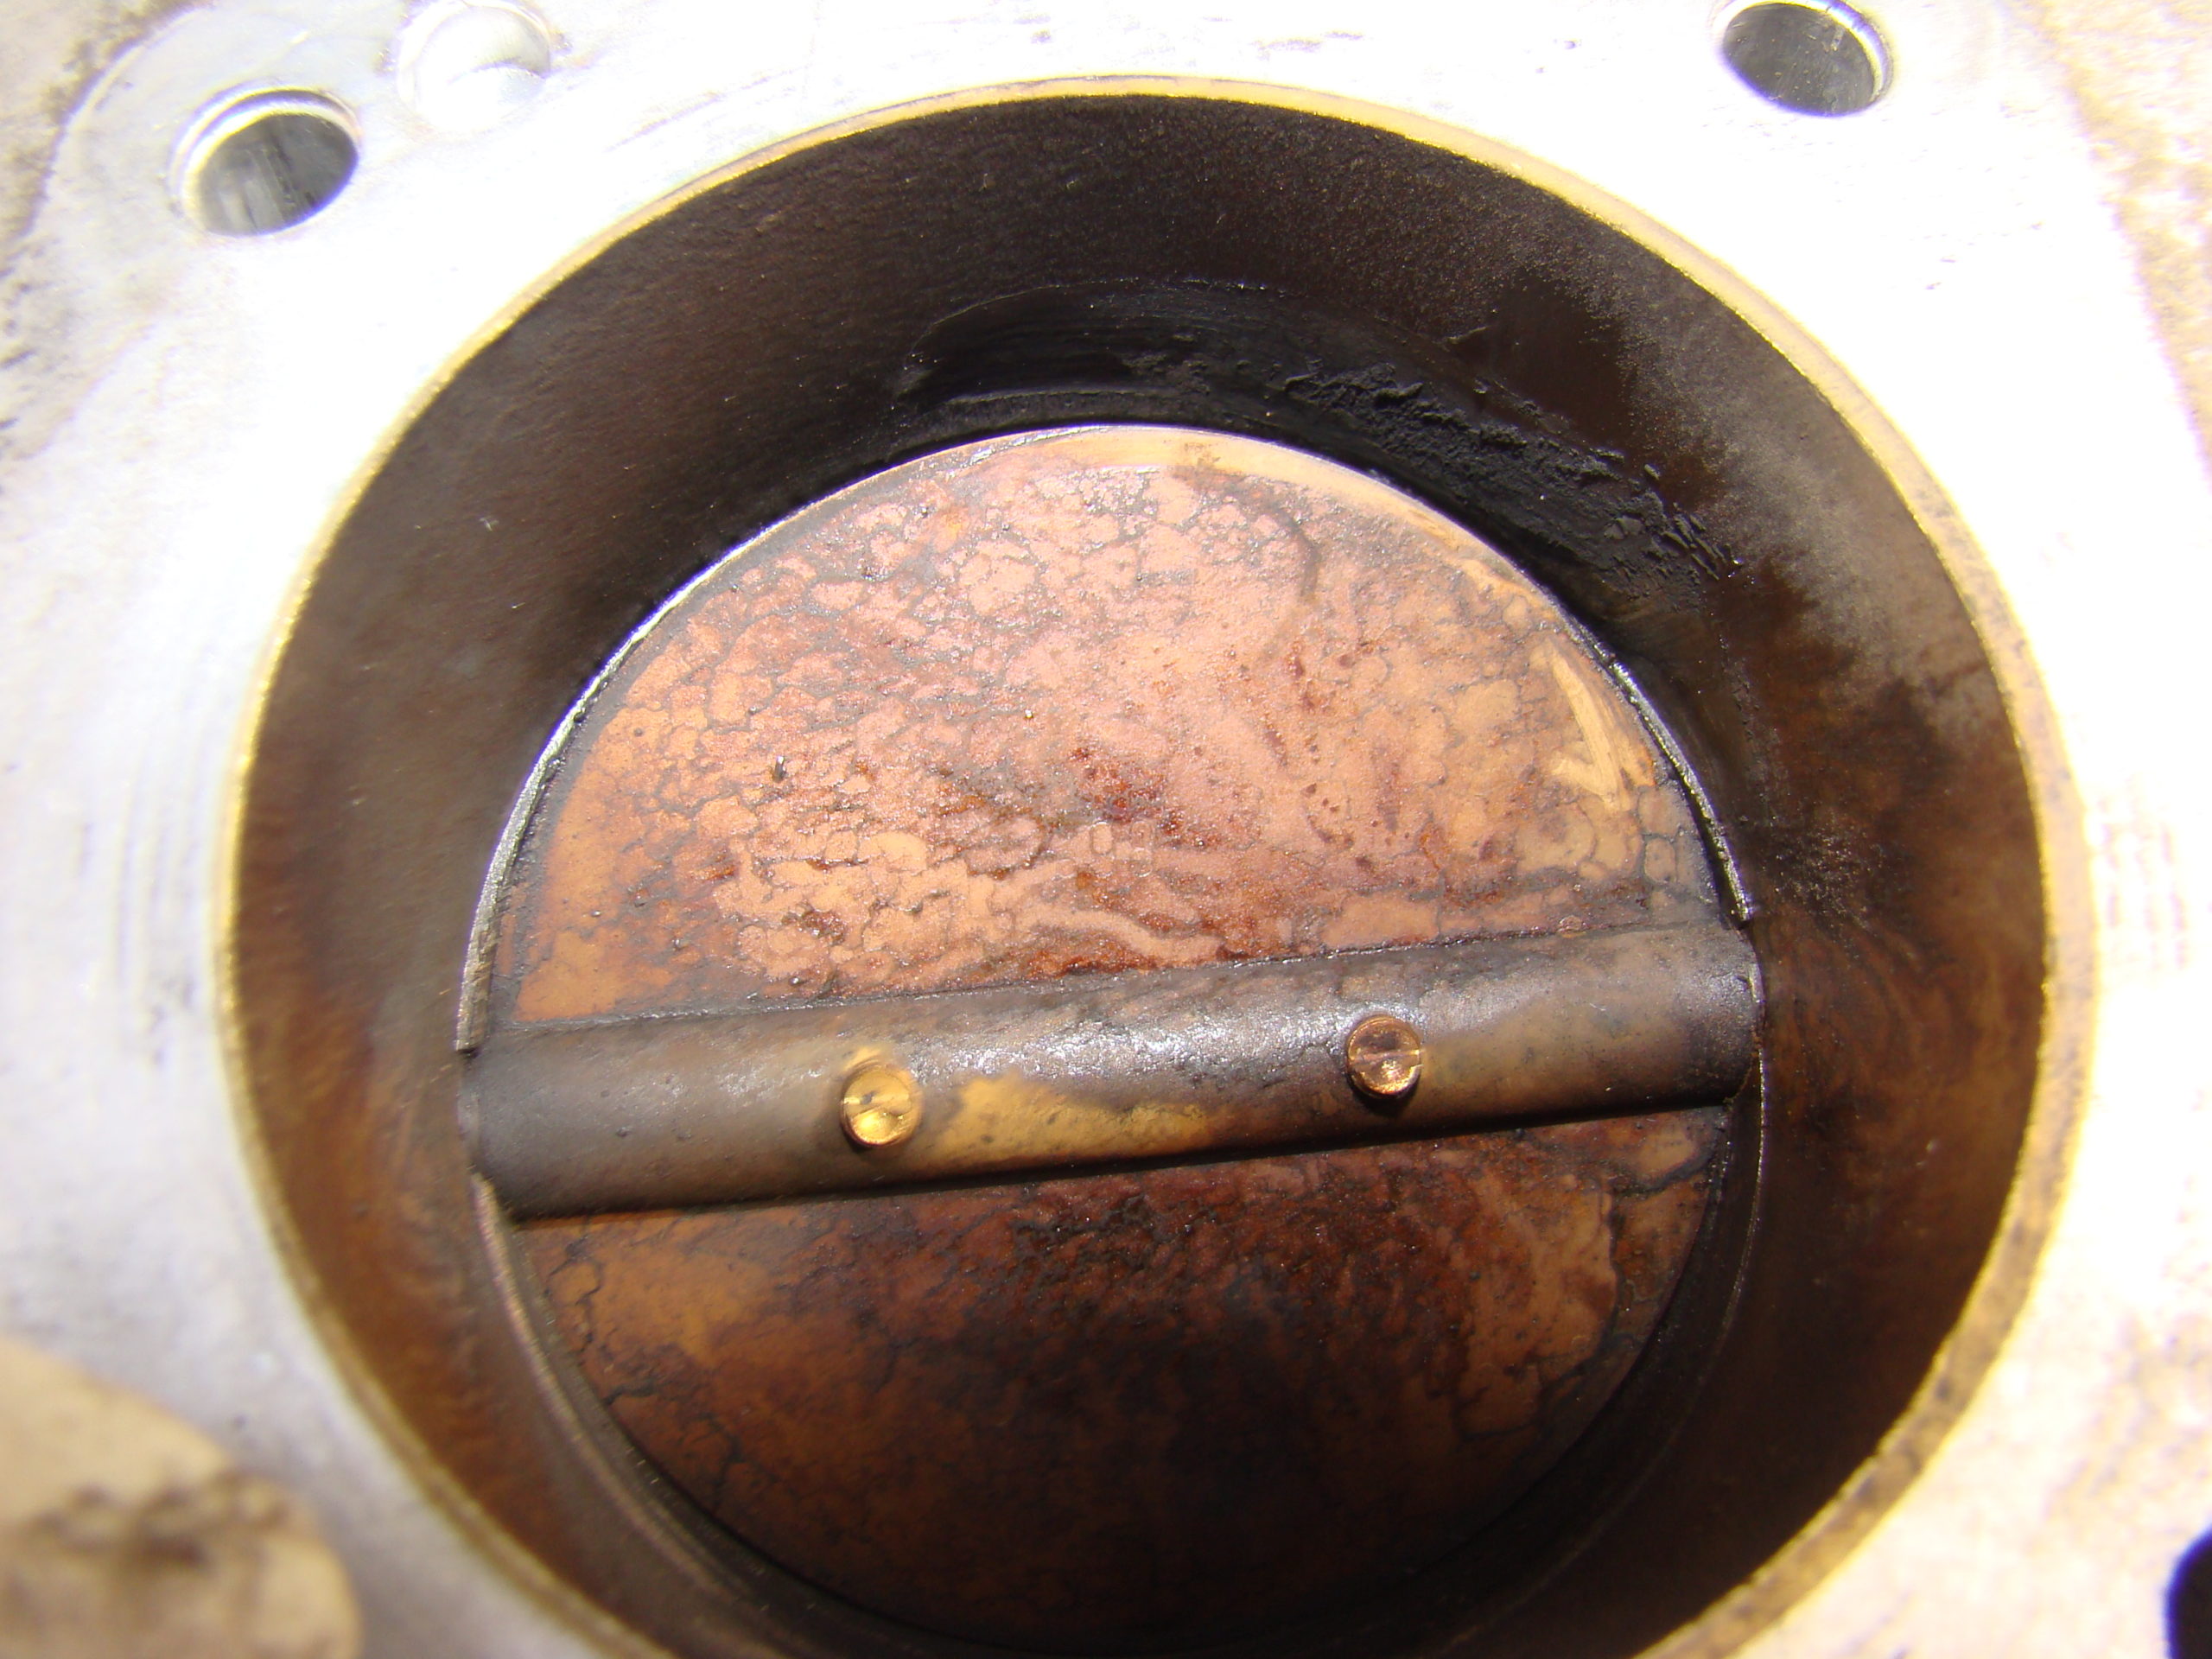
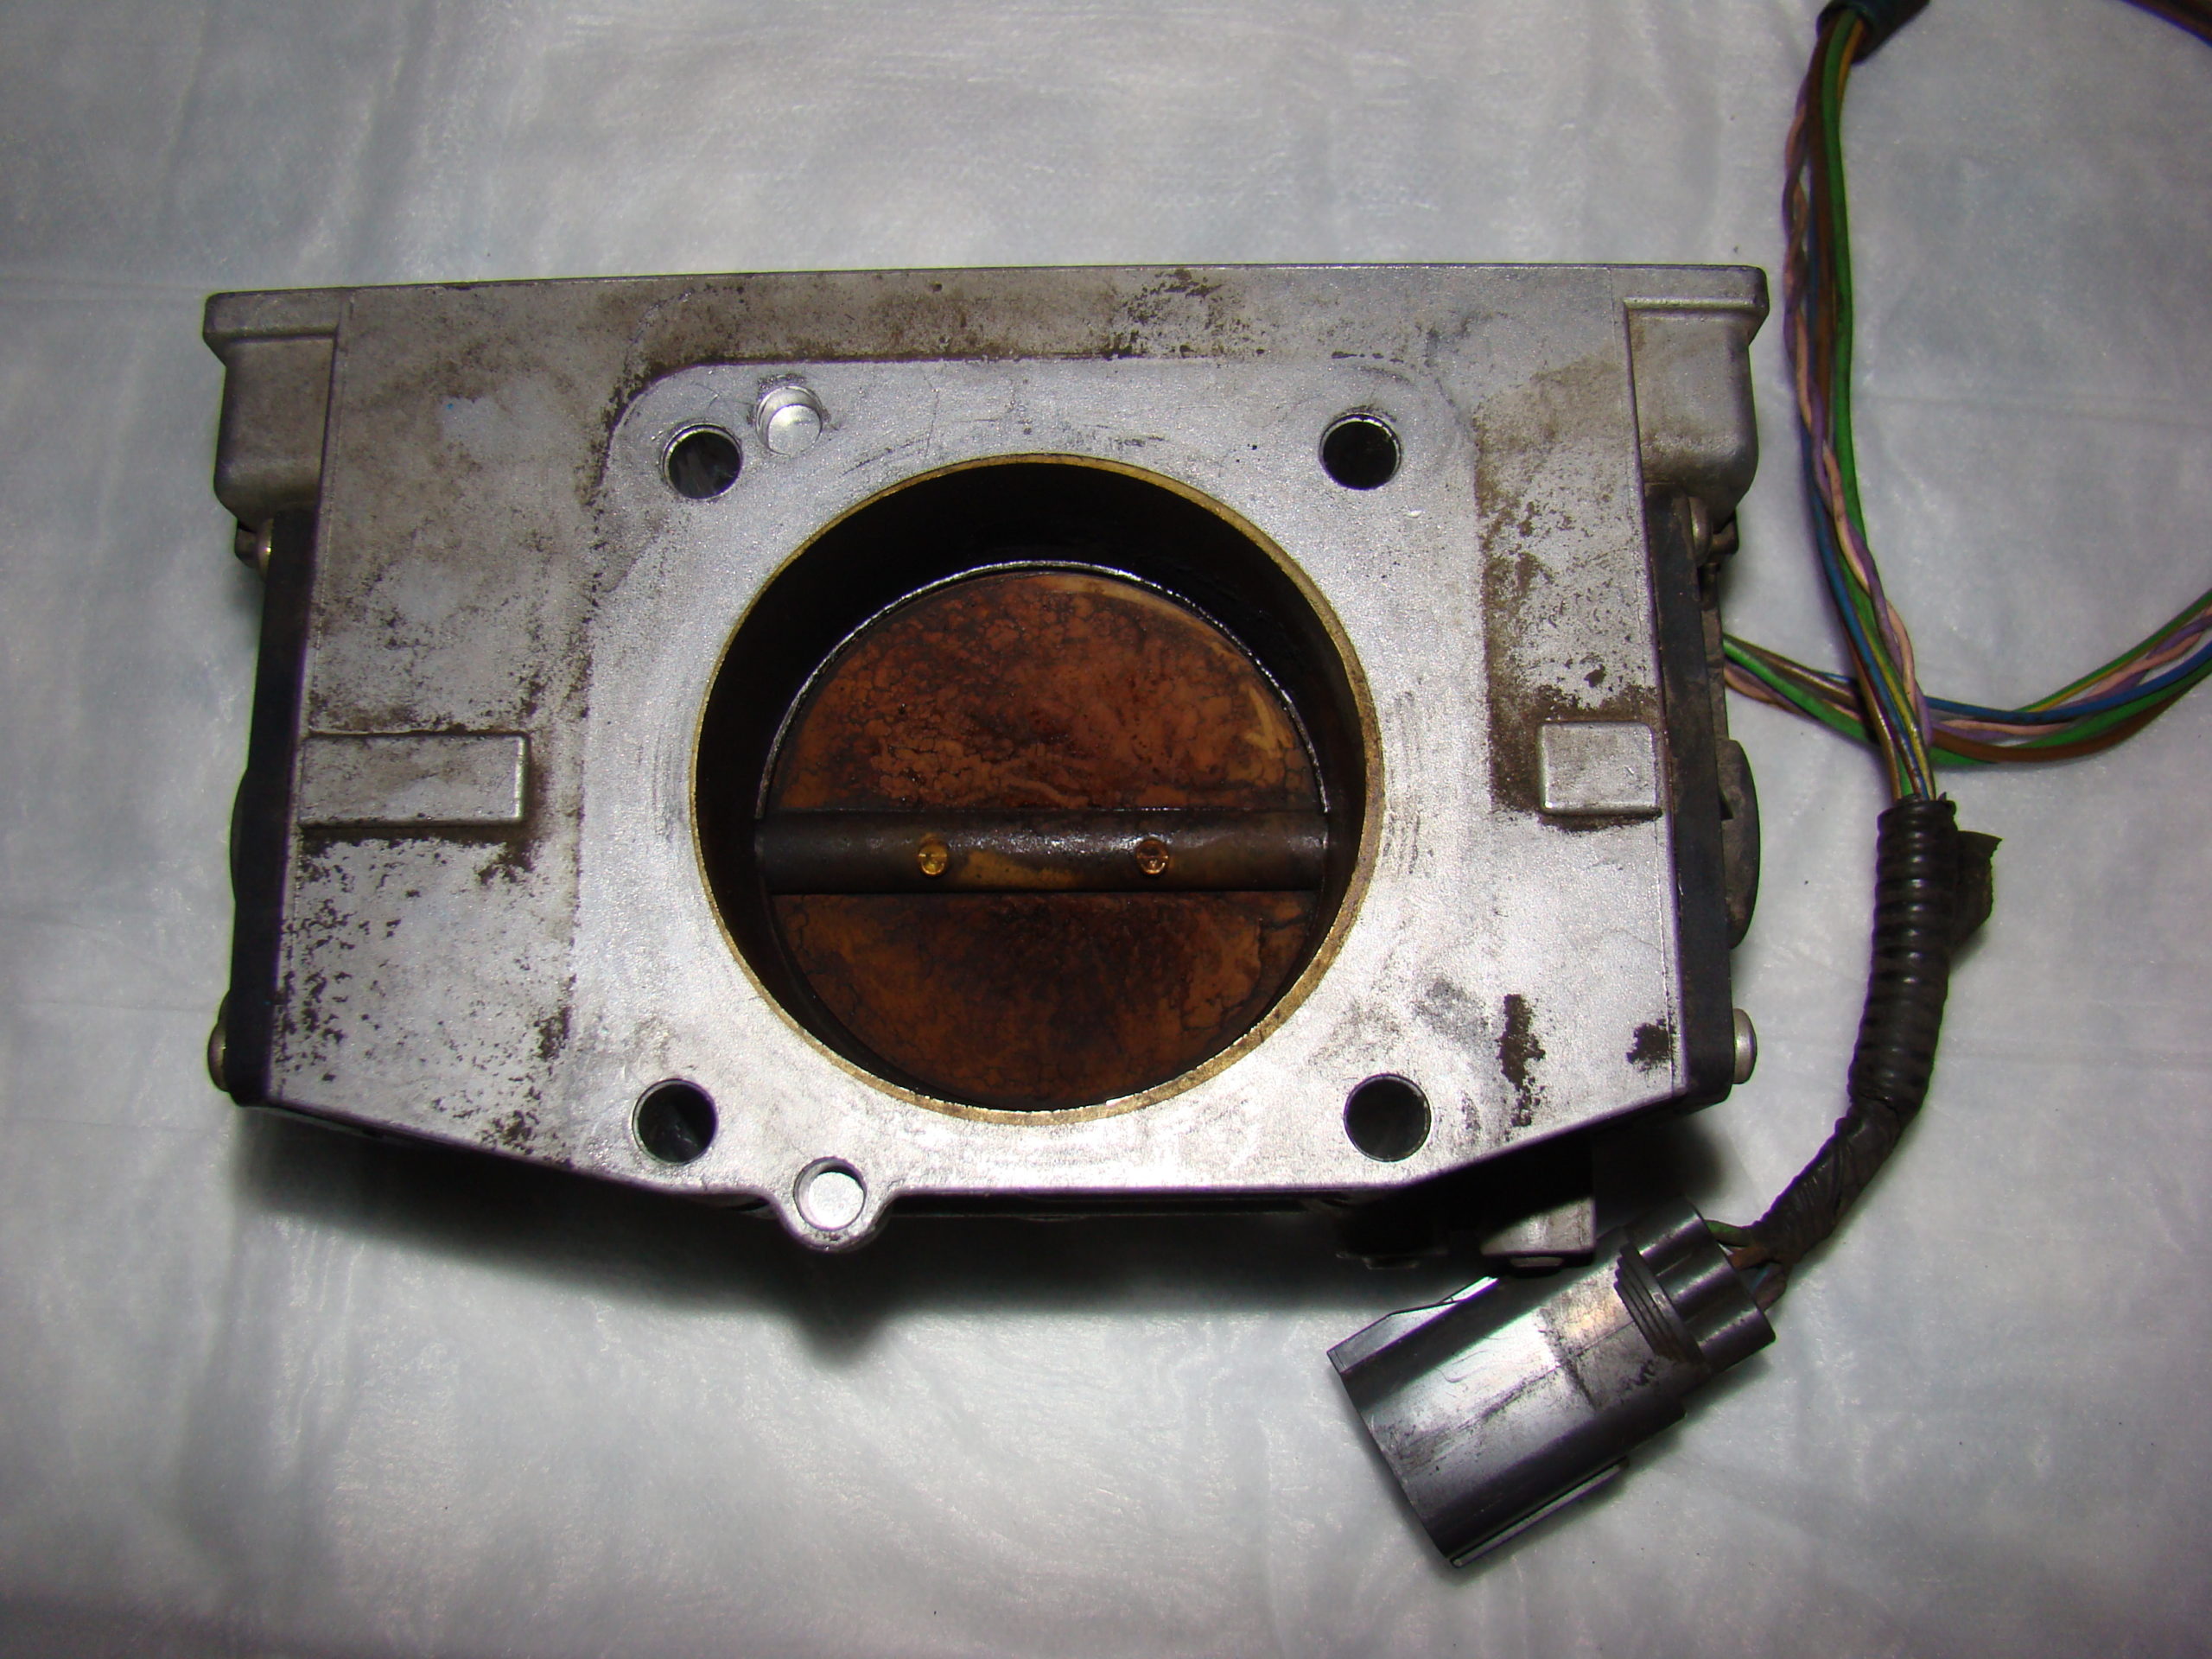
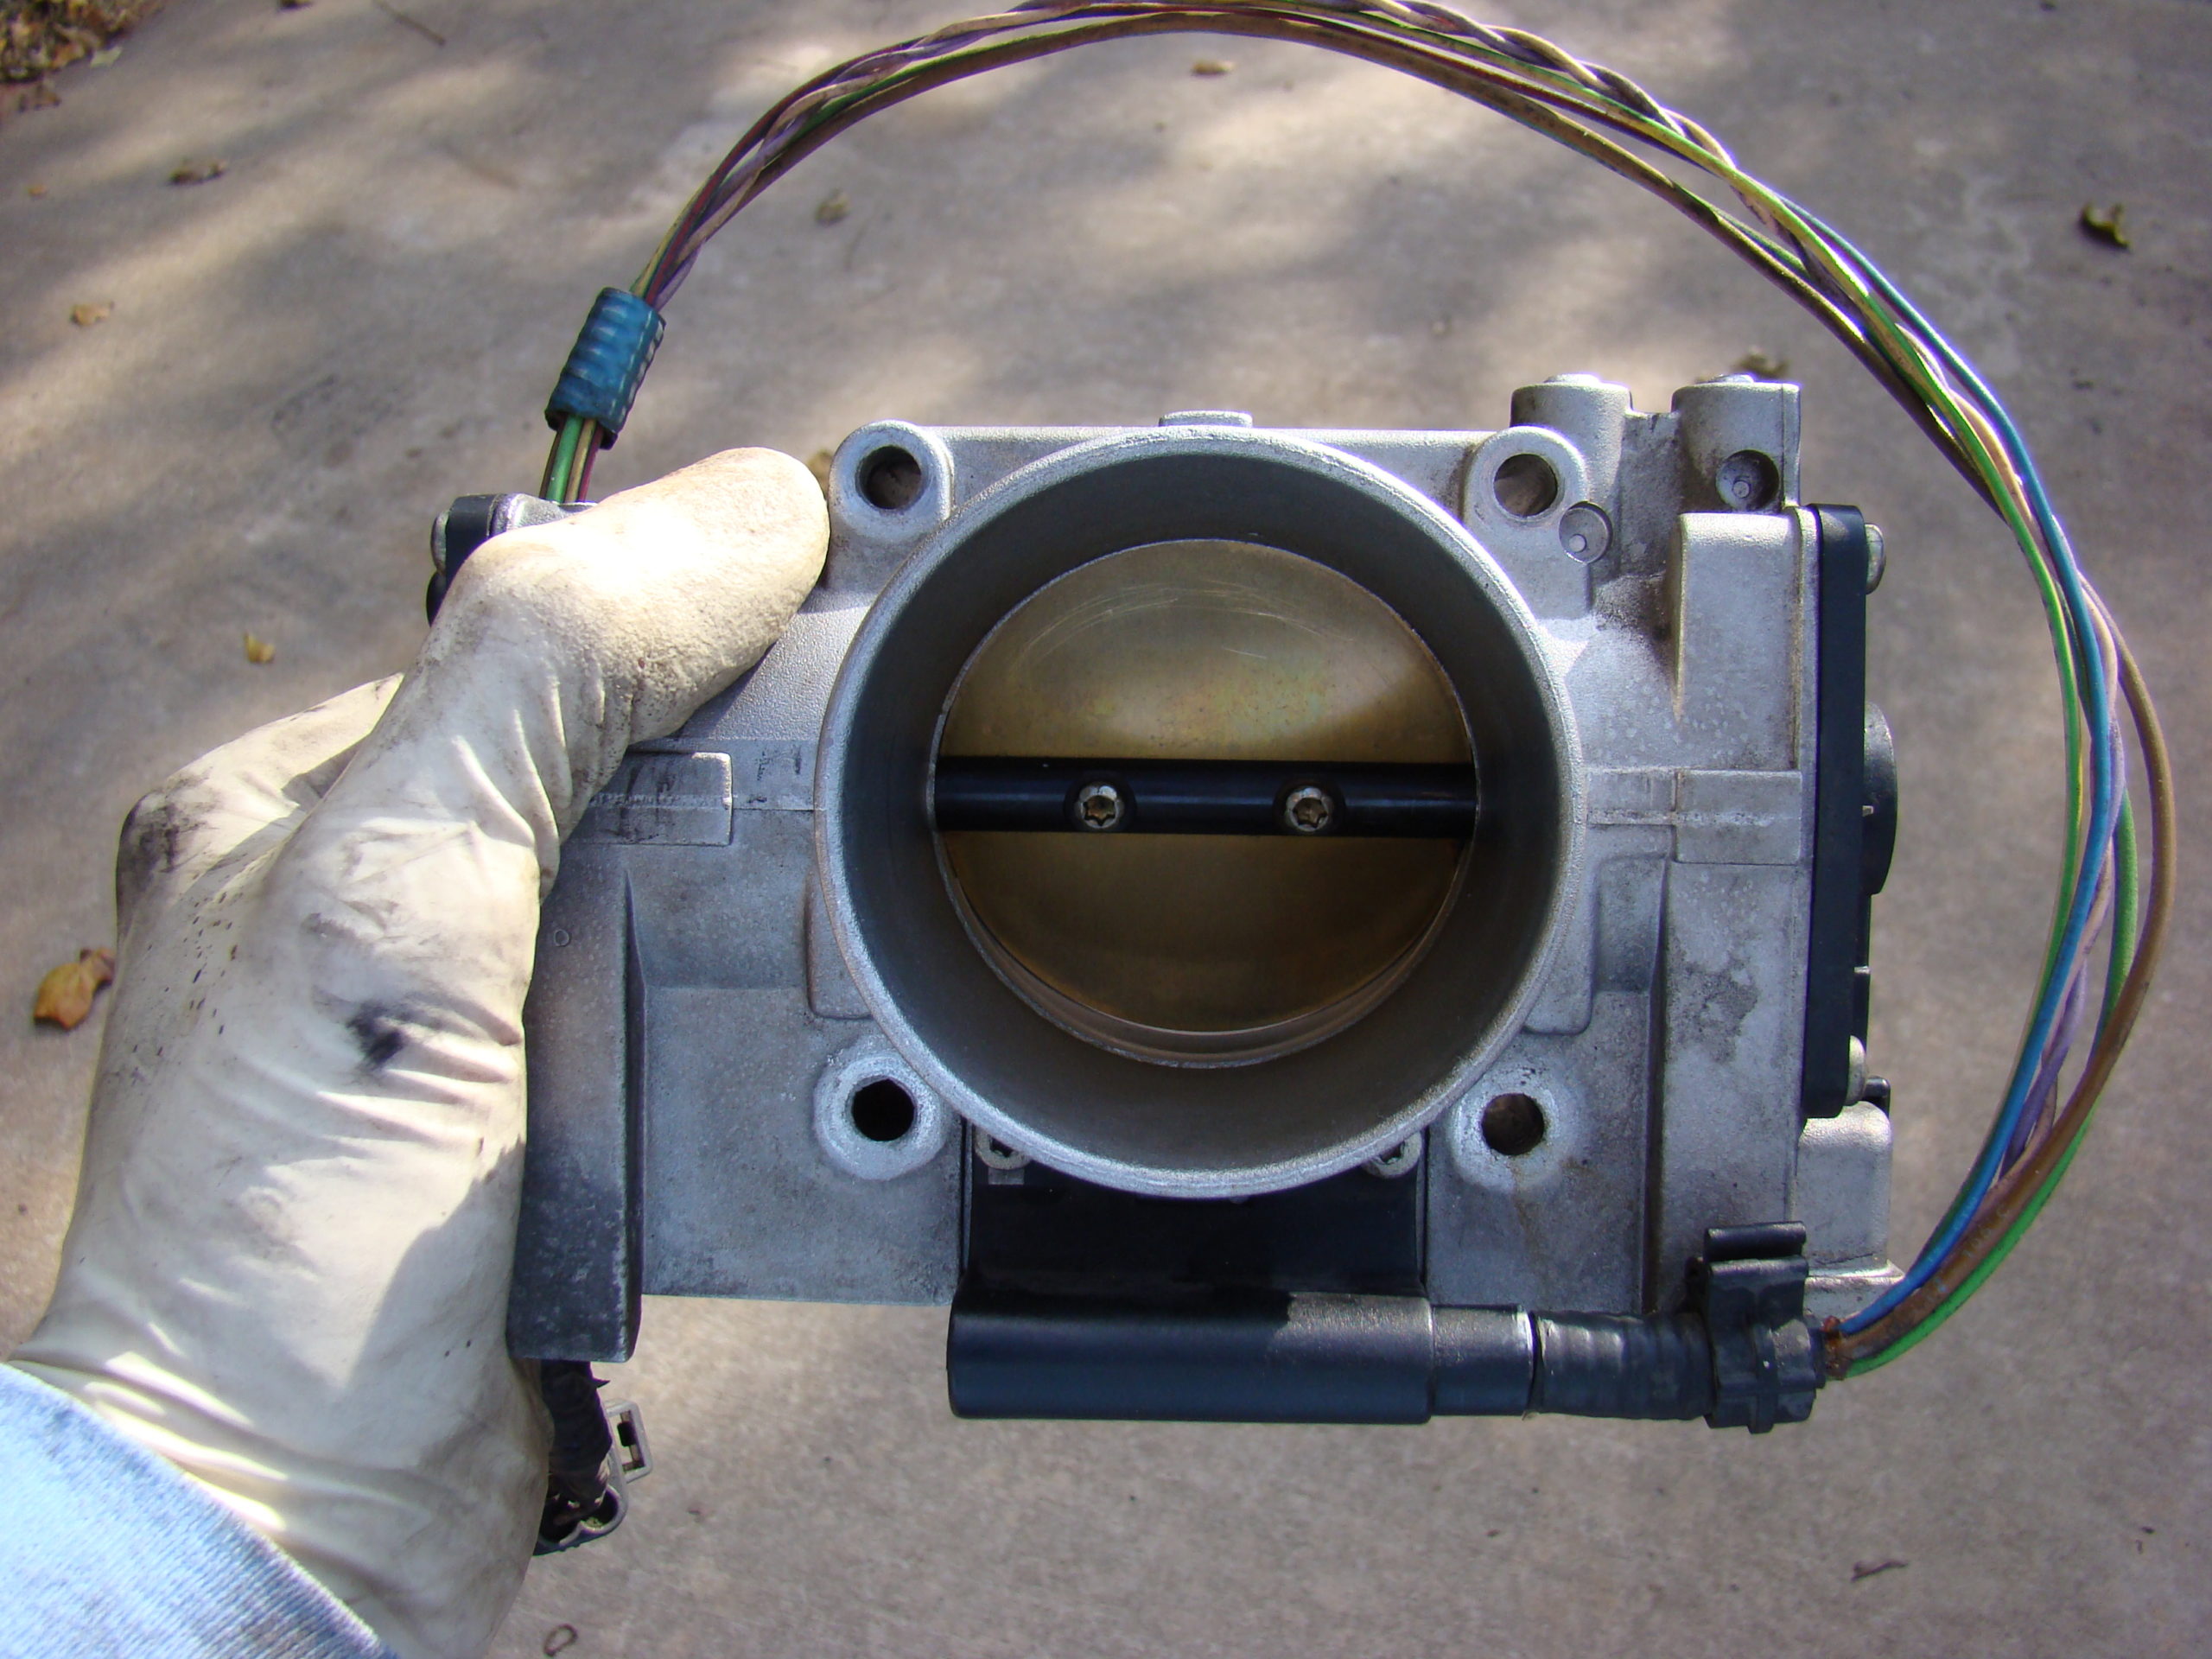
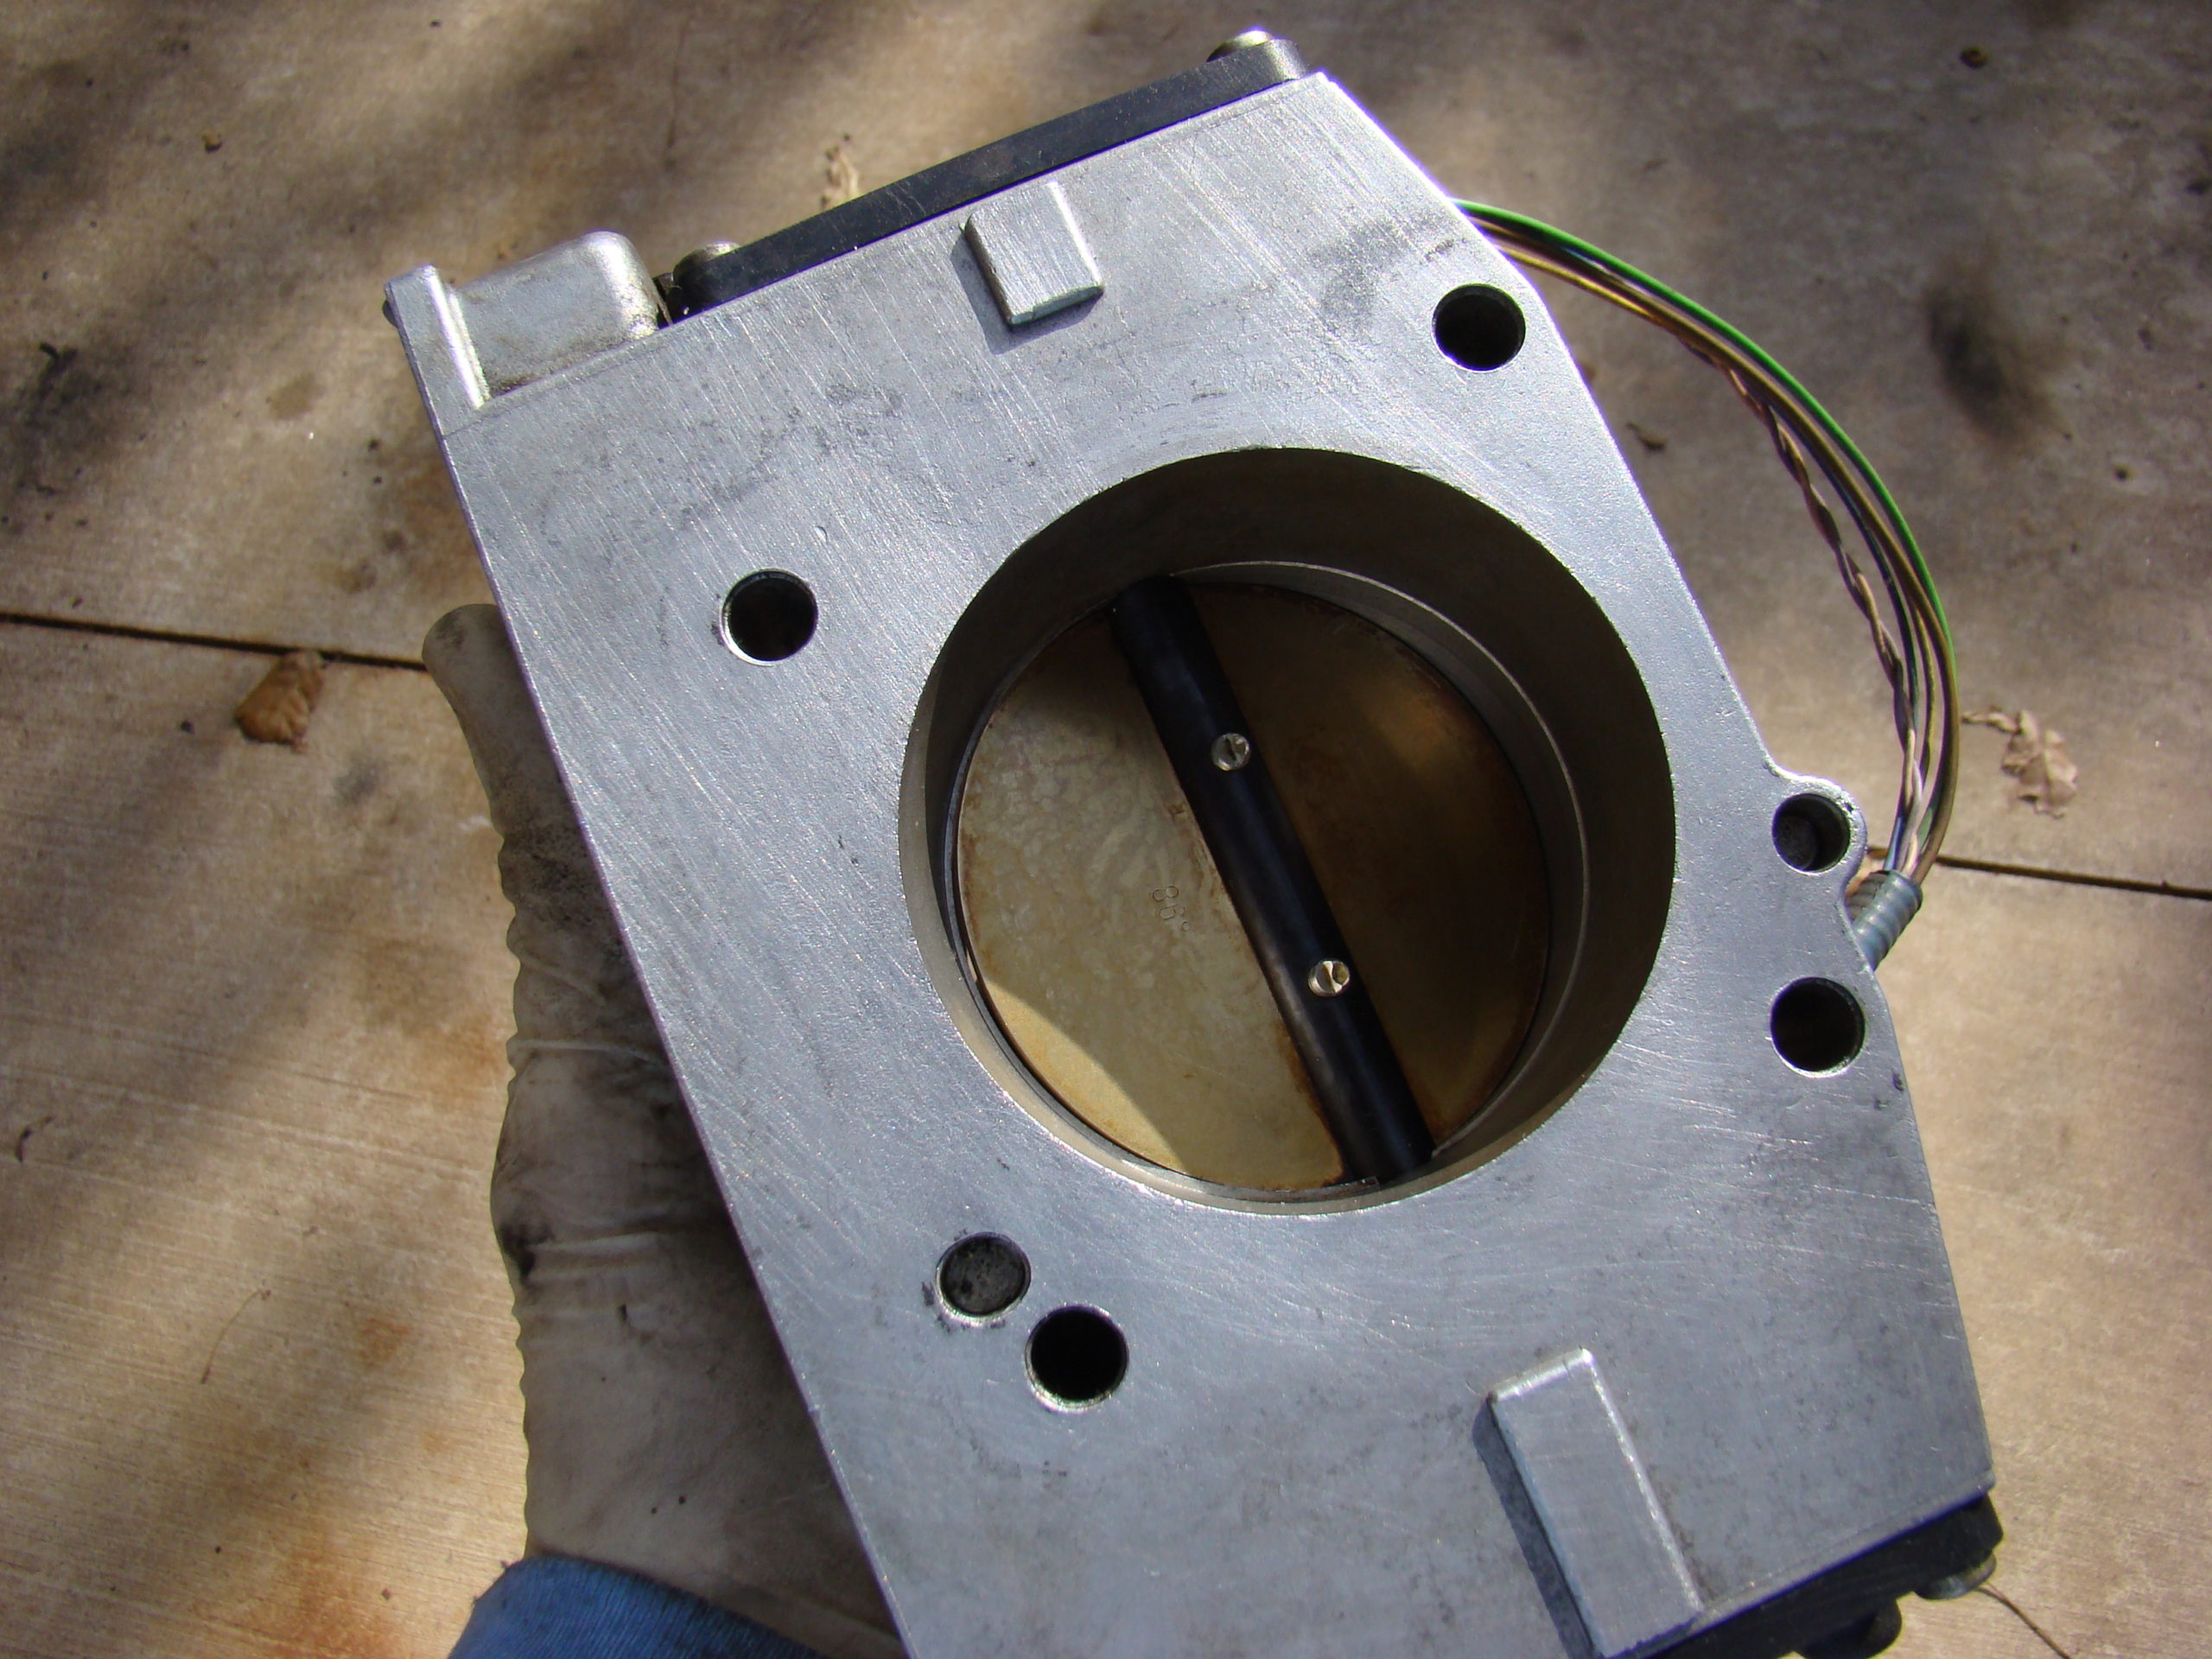
    Here are some photos from before the cleaning. The approach I took was to just soak a paper towel in carb cleaner and stuffed it into each end of the throttle body. I then let that sit for 30 minutes or so and came back with an old toothbrush and scrubbed it down. I just kept scrubbing until it was to my liking.

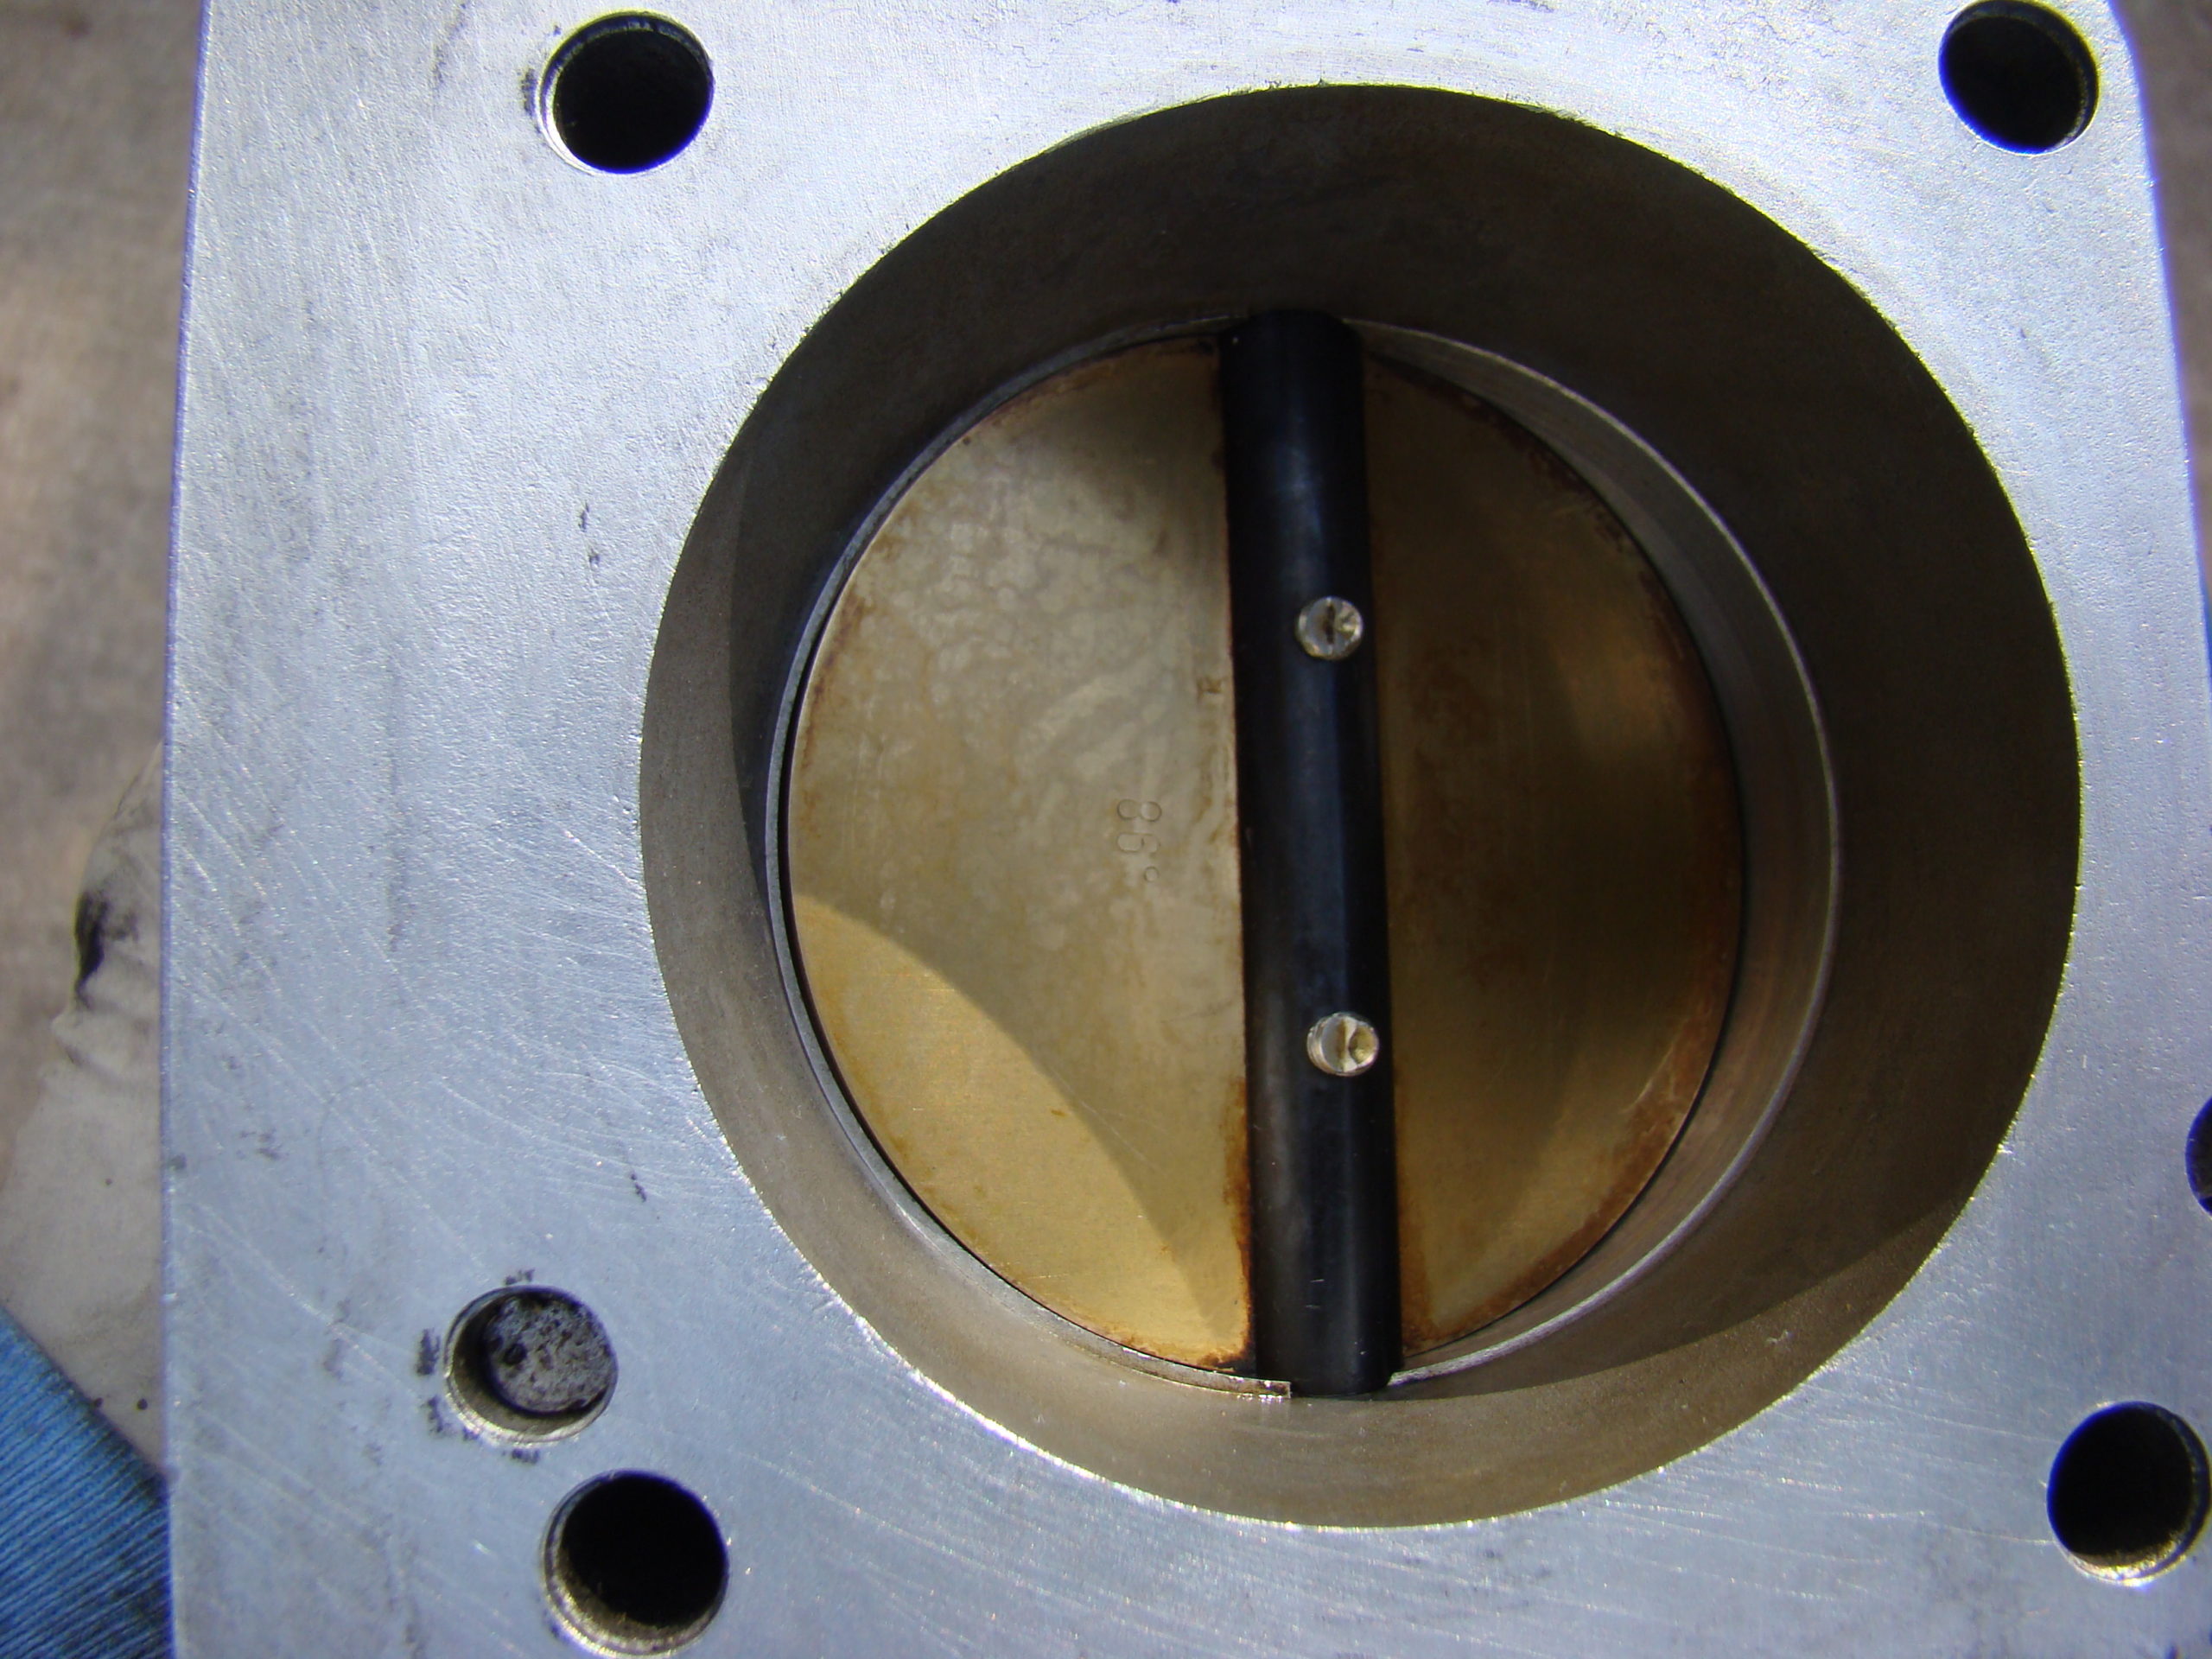
    Here are the pictures after a few rinse and repeat sessions. You’ll notice that the wiring harness is missing most of its conduit so I ended up just covering it with electricians tape. I will be doing this project soon on our other Volvo S60 and I plan to use the replacement conduit listed in the products tab above for a more OEM appearance. I always think it’s a good idea to try and make everything as good or better than it was if you are dealing with it anyway.


    Here is the video that helped me out immensely during this process.

    I hope this post helps you in some way. Feel free to comment with any questions you might have or experiences that you’ve had that might be beneficial to someone thinking of attempting this maintenance.

    Last Updated: Sep 7, 2022 @ 6:33 pm

    Visited 161 times, 1 visit(s) today

    Spread the word

    • Click to share on Facebook (Opens in new window) Facebook
    • Click to share on X (Opens in new window) X
    • Click to share on Pinterest (Opens in new window) Pinterest
    • Click to share on Tumblr (Opens in new window) Tumblr
    • Click to share on Reddit (Opens in new window) Reddit

    Related

    Share. Facebook Twitter Pinterest LinkedIn Tumblr Email
    Jason Kent
    • Website

    I am not a professional mechanic (or writer) but I take pride in fixing cars and not only keeping them going but making them better. I have slightly above average skills just like I would expect a lot of people who find this website do. Please follow my advice at your own risk... sometimes I fix things but sometimes I make them worse!

    Related Posts

    Checking your Volvo PCV System

    Keeping a Volvo S60 intake hose in place

    2 Comments

    1. mime on March 31, 2019 3:07 am

      after cleaning did you need to have it reprogrammed or updated?

      Reply
      • Jason Kent on April 18, 2019 7:42 pm

        Hello! I apologize for the late reply, I didn’t a notice of this comment. I did not have to reprogram or update anything after cleaning the throttle body. If I recall there was a process of leaving the ignition in the on position for 10 minutes before you start the car to allow the ETM to reset itself properly.

        Reply

    Leave a ReplyCancel reply

    • Mina Gallery Exhaust – 2005 Jaguar XJ8 VDP 7 views

    • Jaguar XJ8 X350 corroded side marker fix 5 views

    • Jaguar Vanden Plas – Fender bender 4 views

    • Jaguar XJ8 Mina Gallery Direct Air Intake 3 views

    • Removing calcium deposits from your car 3 views

    My Tweets
    Tags
    5 Series 300zx 840CI Aftermarket Garage BG 44K BMW brakes Cabin Filter Clock Comfort console coolant Detailing E31 Engine Knock Fram Fuel Additives Fuel Tank Honda improvements Infiniti Jaguar Lucas Maintenance Nissan Octane Booster Oil Change PCV performance power steering Quick Fixes Ridgeline S60 Side Marker Sound thermostat trim upgrades VH45DE Volvo volvo s60 wheel clearance X350 XJ8 z32
    Facebook X (Twitter) Instagram Pinterest YouTube Tumblr
    © 2025 Aftermarket Garage

    Type above and press Enter to search. Press Esc to cancel.