Aftermarket Garage
    Facebook Twitter Instagram
    Trending
    • Jaguar X350 XJ8 coolant leak
    • 2005 Jaguar XJ8 Vanden Plas Coolant Reservoir
    • 2009 Honda Ridgeline has clock issues with 2022
    • Replacing the cabin filter in a Honda Ridgeline
    • Nissan VH45DE Engine Sound
    • Changing the oil in a 2009 Honda Ridgeline
    • Removing calcium deposits from your car
    • Jaguar XJ8 X350 corroded side marker fix
    Facebook Twitter Tumblr
    Aftermarket Garage
    • Home
    • Maintain
    • Repair
    • Improve
    • Store
      • Top Products
    • Garage
      • BMW
        • 1999 BMW M3 E36
        • E39 BMW M5
      • Honda
        • 2009 Honda Ridgeline RTL
      • Mercedes-Benz
        • 2001 Mercedes-Benz S430
        • 2006 Mercedes-Benz S600 AMG Sport
      • Nissan
        • 1996 Nissan 300ZX 2+2 5 Speed
      • Jaguar
        • 2005 Jaguar XJ8 Vanden Plas
      • Volvo
        • 2001 Volvo S60 2.4t
        • 2001 Volvo S60 T5
    • About
      • Privacy Policy
    Aftermarket Garage
    You are at:Home»Maintenance»Replacing the cabin filter in a Honda Ridgeline

    Replacing the cabin filter in a Honda Ridgeline

    1
    By Jason Kent on September 29, 2015 Maintenance

    This time of year I like to take a little time to change the cabin filters on our vehicles. Most manufacturers recommend to replace them around 15,000 miles which is about how many miles we drive our cars in a year. If you have to drive your car on a dusty gravel road often then you might want to consider changing it a couple of times a year.

    Products Used

    Fram Fresh Breeze Cabin Filter

    Quick Steps

    1. Open the glove compartment
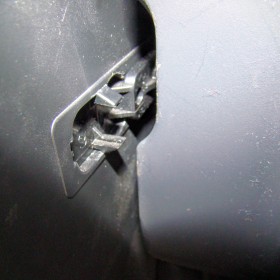
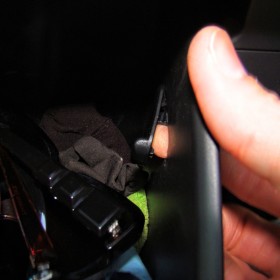
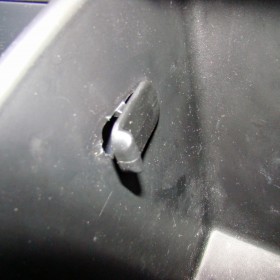
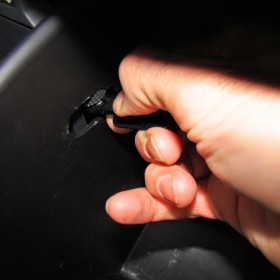
    2. Remove the stop retainers on each side and the slow rod from the right side if equipped
    3. Lower the glove box out of the way
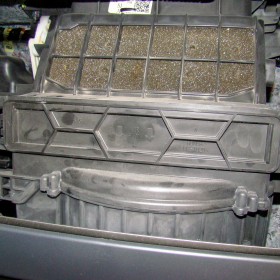
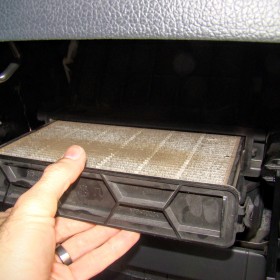
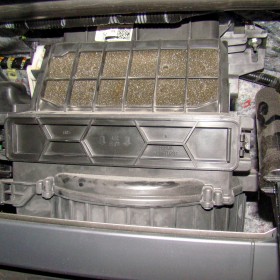
    4. Find the cabin filter tray and press in on the clips on each side and slide the tray out.
    5. Remove the dirty filter from the tray
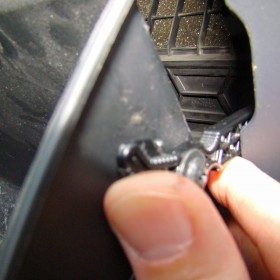
    6. Install the new filter making sure the air flow arrow is facing downward to match the air flow arrows on the tray. Also make sure that the filter is seated in the tabs on each end.
    7. Put the tray back in place and reverse the steps to put the glove compartment back in place.

    Most vehicles allow relatively easy access behind the glovebox to the cabin filter but I’ve had to deal with some that aren’t that simple. For this post though I’ll be changing the filter on our 2009 Honda Ridgeline which isn’t bad at all.

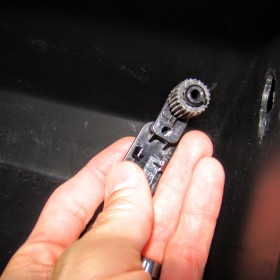
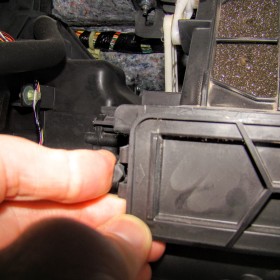
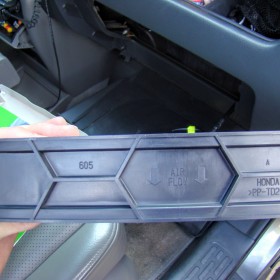
    First you’ll want to open the glove compartment and find the stop retainers on either side. You’ll see from the photos how they are held in, they can be easily popped out by pressing the holding tabs down and then you can work them out of the slot. Some versions also have a plastic retainer clipped on the right side that connects to a shock that is there to make the glovebox open slowly. You’ll just need to pop that off while holding on to the glove compartment then lower it out of the way.

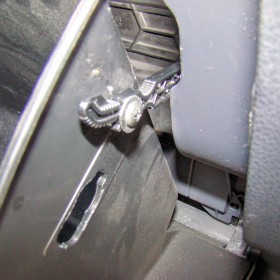
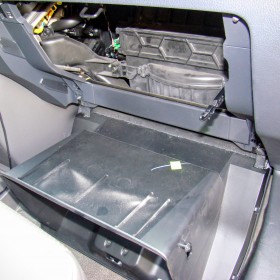
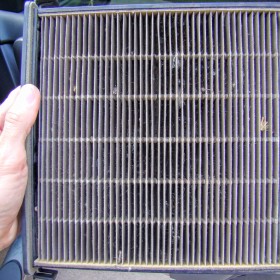
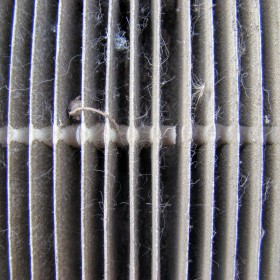
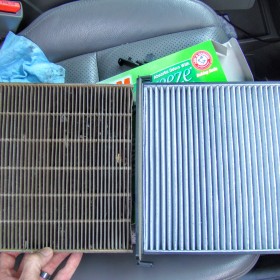
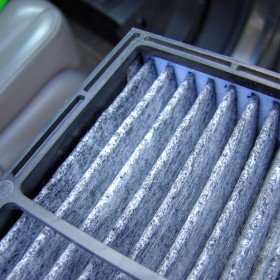
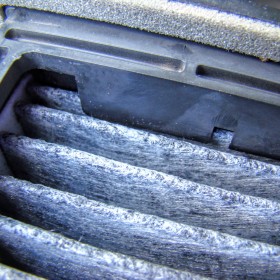
    Once you have the glovebox out of the way find the cabin filter tray and remove it by pressing in on the clips that hold it in place on each side. There are arrows on the tray to show you which direction to push in order to release it. You can see from the pictures that our filter was definitely in need of replacing. It always interests me to see all of the debris caught in filters so I probably spend more time digging through there than the average person but feel free to just throw yours away!

    Next you need to simply replace the old filter with the new one. This time I decided to try the Fram FreshBreeze filter to see how it works to clear up some of the musky odors that we usually have in this vehicle. So far I notice that I am certainly getting better smells coming from the AC vents but time will tell how well it does.

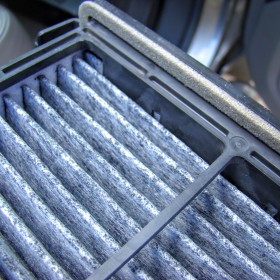
    I tried to show in the photos how the folds on each end of the filter are seated behind the plastic tabs to allow for a better seal. You’ll want to make sure your filter is seated properly for optimum performance.

    At this Point you simply need to slide the tray back in place and then fasten everything back up in the reverse order of how it was removed. Make sure the stop clips on each side are snapped back in place properly and that you reinstall the lowering piston clip if applicable.

    Spread the word

    • Click to share on Facebook (Opens in new window)
    • Click to share on Twitter (Opens in new window)
    • Click to share on Pinterest (Opens in new window)
    • Click to share on Tumblr (Opens in new window)
    • Click to share on Reddit (Opens in new window)

    Related

    Share. Facebook Twitter Pinterest LinkedIn Tumblr Email
    Jason Kent
    • Website

    I am not a professional mechanic (or writer) but I take pride in fixing cars and not only keeping them going but making them better. I have slightly above average skills just like I would expect a lot of people who find this website do. Please follow my advice at your own risk... sometimes I fix things but sometimes I make them worse!

    Related Posts

    2009 Honda Ridgeline has clock issues with 2022

    Changing the oil in a 2009 Honda Ridgeline

    Removing calcium deposits from your car

    1 Comment

    1. Jason Kent on December 14, 2015 12:29 pm

      Fun follow up on this, I had to take the Honda to the dealer today to have the rear axle seals replaced under warranty. They sent me the usual laundry list of other items I need to address. They found that my 2 1/2 month old cabin filter was dirty and in need of replacement at the bargain cost of only $92.13!

      Reply

    Leave a Reply Cancel reply

    Popular Today
    • Jaguar XJ8 X350 Center Console Removal I removed the console this weekend to in...
    • Incredible 300ZX Z32 Interior Upgrade I ran across this amazing piece of after...
    • Replacing the cabin filter in a Honda Ridgeline This time of year I like to take a littl...
    • Jaguar X350 XJ8 coolant leak I'll hopefully write up more on this lat...
    • Removing calcium deposits from your car Sometimes the normal routine that you us...
    • Volvo S60 2.4t Throttle Body Cleaning If you are having issues with a rough id...
    • Volvo S60 Timing Belt Replacement This is a great how-to video from Jason...
    My Tweets
    Tags
    5 Series 300zx Aftermarket Garage BG 44K BMW brakes Cabin Filter Clock Comfort console coolant Detailing Engine Knock Fram Fuel Additives Fuel Tank Honda improvements Infiniti interior Jaguar leather Lucas Maintenance Nissan Octane Booster Oil Change PCV performance Quick Fixes Ridgeline Rust S60 Side Marker Sound thermostat trim upgrades VH45DE Volvo volvo s60 wheel clearance X350 XJ8 z32
    Popular Posts This Week
    • Incredible 300ZX Z32 Inte... I ran across this amazing piece of aftermarke...
    • Removing calcium deposits... Sometimes the normal routine that you use to...
    • Jaguar XJ8 X350 Center Co... I removed the console this weekend to investi...
    • Treating surface rust on... I try to avoid buying cars that have spent mo...
    • Jaguar XJ8 Mina Gallery D... Stay tuned for my write up on this project.  ...
    • Jaguar X350 XJ8 coolant l... I'll hopefully write up more on this later bu...
    Popular Posts this Month
    • Incredible 300ZX Z32 Inte... I ran across this amazing piece of aftermarke...
    • Removing calcium deposits... Sometimes the normal routine that you use to...
    • Jaguar XJ8 X350 Center Co... I removed the console this weekend to investi...
    • 2005 Jaguar XJ8 Vanden Pl... PROJECT STATUS: Incomplete - On Hold I've rec...
    • Treating surface rust on... I try to avoid buying cars that have spent mo...
    • Jaguar XJ8 X350 corroded... One of the first things that I do when I buy...
    Popular Items
    • Schumacher SE-1072 5/10 A... Can charge six 12-volt or twelve 6-volt batte...
    • Bosch 0280160297 Fuel Pre... Corrosion resistant housing material Premium...
    • Schumacher SE-6030 4/30/6... Helps in fleet operations and industrial use ...
    • Schumacher PSW-3060 DSR P... Charges 6 and 12 Volt batteries Starting ampe...
    • Schumacher PSW-61224 DSR... Charges 6, 12 and 24 Volt batteries Starting...
    • Schumacher SS-51A-PE Ship... For onshore charging needs Can be switched to...
    Hot Today
    • Schumacher SE-1072 5/10 A... Can charge six 12-volt or twelve 6-volt batte...
    • Schumacher SS-51A-PE Ship... For onshore charging needs Can be switched to...
    • Schumacher PSW-3060 DSR P... Charges 6 and 12 Volt batteries Starting ampe...
    • 520 Piece Electrical Term... Provides a secure connection between two wire...
    • OES Genuine Engine Mount... OES Genuine Engine Mount - This is the engine...
    • Schumacher PST-500 DSR Pr... 500 ampere Carbon Pile Charging System Analyz...
    Facebook Twitter Instagram Pinterest YouTube Tumblr
    © 2023 Aftermarket Garage

    Type above and press Enter to search. Press Esc to cancel.