
PROJECT STATUS: Incomplete – On Hold
I’ve recently begun the process of figuring out how to bring this 10-year-old car into the modern age technology-wise. The goal is to get a 7″ double din system that will interface with our phones, play music, provide navigation, allow for hands free phone use, display/store OBDII data and support a rear view camera.
Tools Used
Products Used
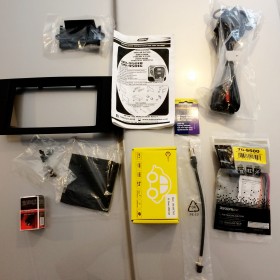
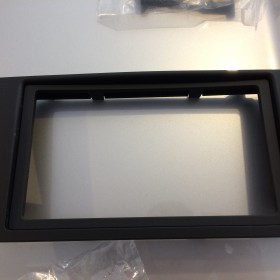
Metra 99-9501B Single or Double DIN Dash Kit
Esky EC170-11 Waterproof Vehicle Car Rear View Backup Camera
Project Notes
Head Unit (radio/cd-player) OEM Part # 2W93-18B876-AK
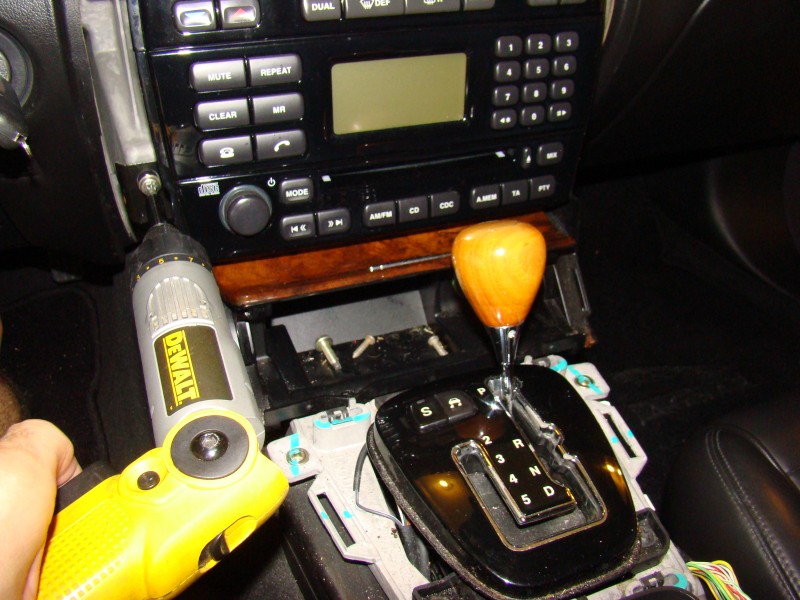
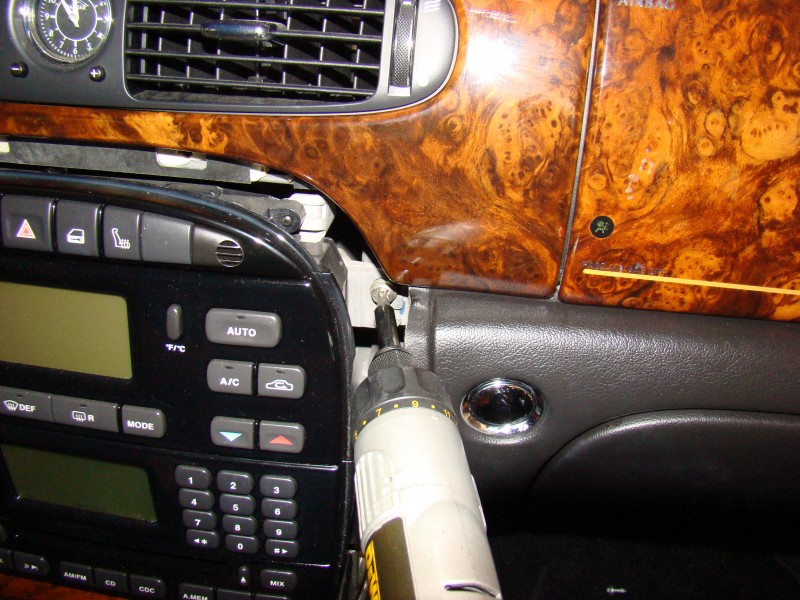
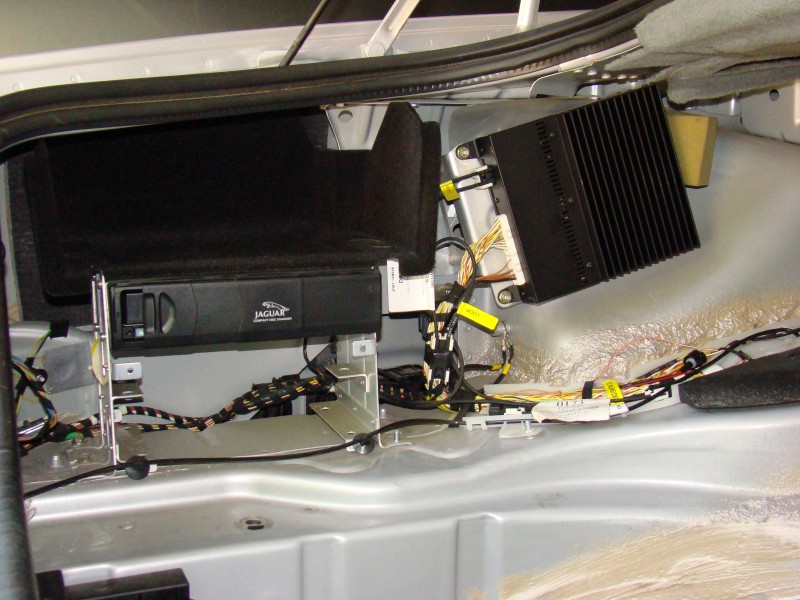
My first step was to investigate the type of connections that are in use on the current system. I removed the center console and then removed the stereo just enough for now to see what type of connections it has. It appears to have a fiber optic connection which surprised me because I thought that only the cars with factory navigation had this. Right now I am researching what my options are and will update this post when I have more information.
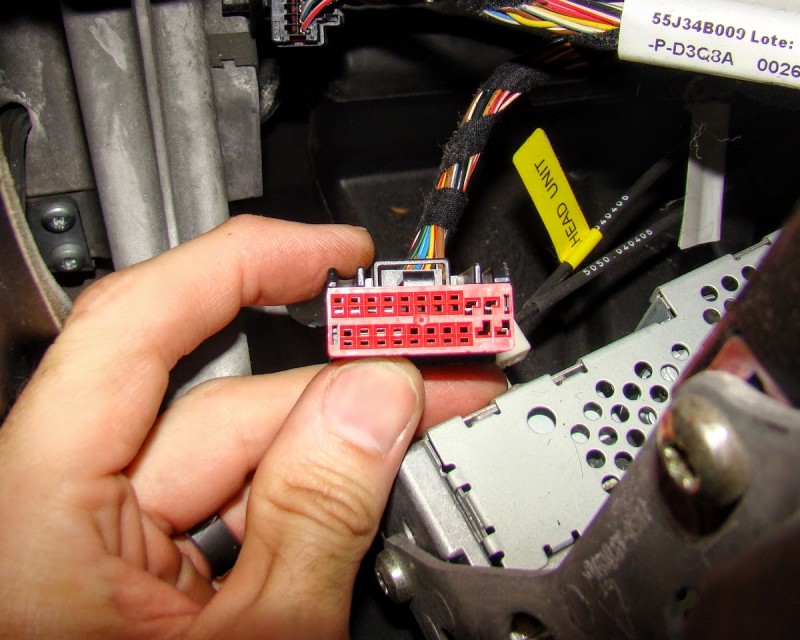
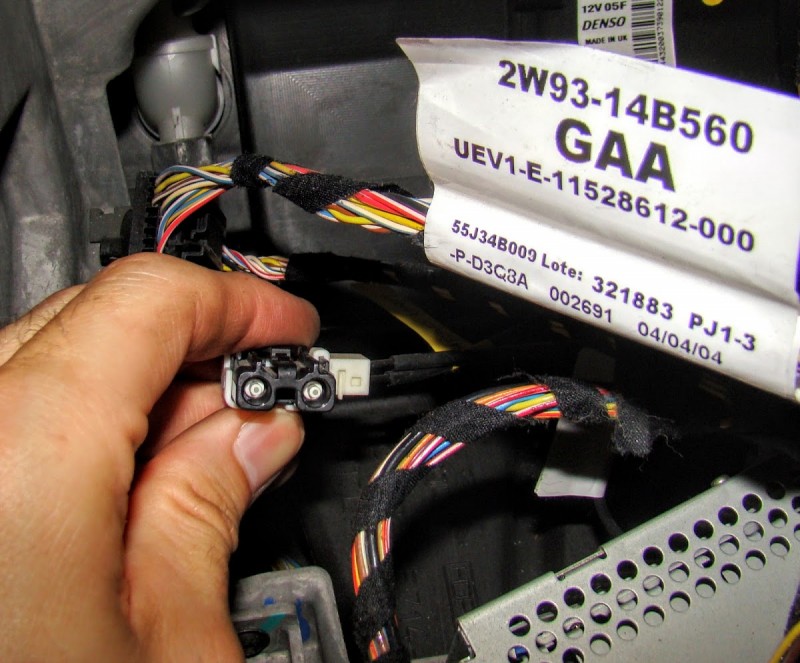
Update: July 26, 2015 I did some more research on the connections to this stereo and I’ve found that the fiber optic connection I mentioned goes to the CD-changer. This is great news for me since I don’t use that anyway (I’m not really sure who does these days). I was also able to find that there is an ISO adapter available for the main harness connector that will make it compatible with a lot of aftermarket stereo options. In theory, all of this means I just need to pick out a stereo system and get it purchased then work out all the kinks once it arrives. Since I will most likely be purchasing from Amazon I should have a 30-day window to make it work and I will have the option to return if I can’t make it happen.
Update: July 28, 2015 I decided to make a move and ordered several components that I need for this project. Based on Amazon reviews I decided to give one of the Android systems from no-name manufacturer a try. They rated 4 stars and most of the reviews seemed pretty positive. For the price, it is worth a shot and if it doesn’t end up working out for the Jaguar I will use it in one of my other projects.
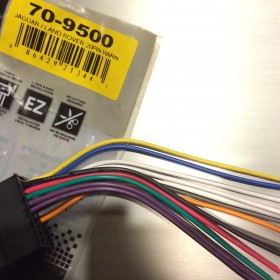
Based on this Jaguar Forums thread I found out some of the other things I would need, such as the antenna adapter, harness adapter and the S-type dash kit. He also mentions a steering wheel control interface but one of the reviews that I read specifically mentioned that this unit doesn’t need that… we shall see. Unfortunately there isn’t a double DIN kit for the XJ8 that I could find so the s-type kit will have to do. It looks like with some black vinyl wrap and a little ingenuity it can be made to look right at home in the X350. I also ordered a waterproof backup camera and a relay switch that is apparently required to make it work properly.
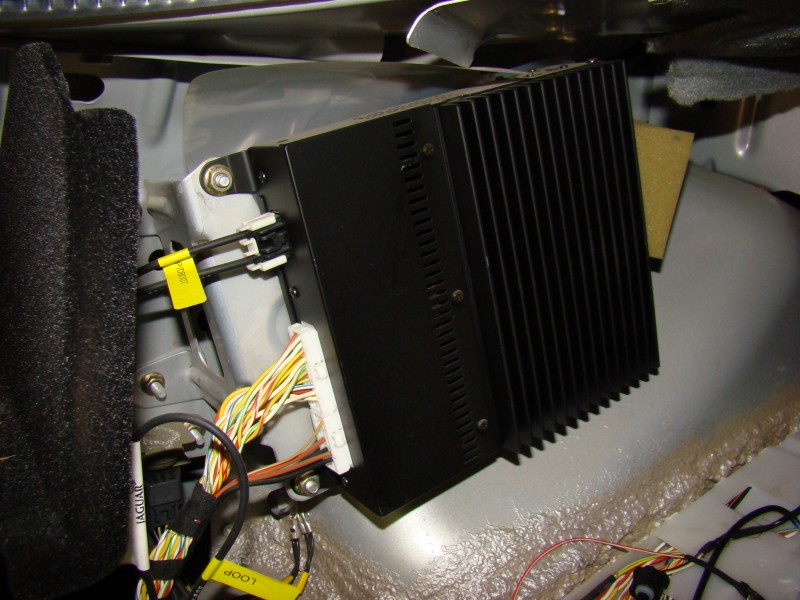
Update: August 6, 2015 The things that I ordered have arrived and I’ve tried to figure out exactly how I’m going to wire this up. The more I research this the more I’m concerned whether or not I’ll be able to make this work in our car. I had said earlier that the fiber optic connection is just for the CD-changer but it may also connect the amplifier. I need to confirm once and for all if we have the premium sound option in our XJ8. Based on what I researched I am 90% sure that we do. I’ve read up on some things to check for to determine if we have the premium sound option in our car.
- Are there 2 subwoofers installed in our rear window deck? Yep, we have these.
- Is there a DSP button on our stereo? Not that I can find.
- Is there an option to adjust the sub-woofer in the audio settings? Yes there is.
If it was a yes for us on all of those then I would have had no doubt, but since we don’t have the DSP button I’m still not 100% sure. I couldn’t find any documents online that would confirm if all X350 Vanden Plas models came with premium sound but I would guess that they do. To confuse things even further I found this forum post that seems to say that the premium sound system is the base system and the upgraded one was called Audiophile.
My next move is to remove the left rear trunk panel and try to find the fiber-optic connections to see if they terminate in the CD-changer or if they loop to something else as well. If they connect to anything else I believe I will have to scrap this initial plan for the Jaguar and go back to the drawing board. I will likely end up using the Android system that I purchased to put in our Volvo S60 since I want to see how it all works and our son could use a rear view camera.
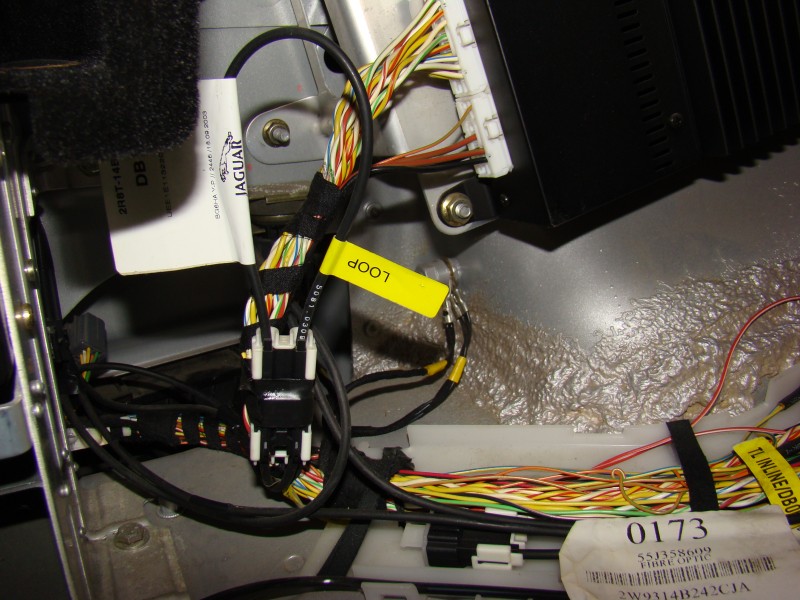
Update: August 7, 2015 I removed the rear trunk panel last night to investigate further. Unfortunately my findings weren’t good for this project. The fiber-optics do go to more than just the CD-changer, they connect to an amplifier as well. I suppose I should have checked this before ordering the parts but in the past I’ve suffered from “paralysis by analysis” and this time I decided just to make a move.
All is not lost, I will continue to work to figure out how to get this car updated. I also plan to shift my focus of the Android system install to our Volvo S60. I’m hoping to the install will be more straight forward there. Luckily I have my S60 parts car to test some things out on first!
Update: August 22, 2016 Wow, it’s hard to believe it’s been a year since I’ve messed with this project, luckily there are folks out there who aren’t being as lazy as I am about it! Lorenzo was kind enough to complete this project and provide a write-up for the procedure he used. Here is the link to his write-up:
Updated:
25 Comments
Great start!!! I have an ’05 as well and was looking to upgrade the stereo also. I haven’t been able to find an aftermarket harness or dash kit. I look forward to your progress and seeing the great results in the end!! I have subscribed to your posts.
Thank you, Lorenzo. It seems that Jaguar made this harder that it should be but I will get it done somehow, soon. They passed a law where I live against smart phone usage while driving that goes into effect on November 1 so I want to have it done by then to allow hands free texting, navigation usage, etc.
Yeah you know they would make it hard. I have been doing some research and it seems that as far as the dash kit one for a x type or s type would work. I’m looking into them a little more. I also found out that the fiber optics plug is only for the factory amp. I’m thinking about upgrading the interior speakers so I could just buy an am to push them. Still looking into the harness though. I’ve even emailed companies in Europe and they don’t have it, but haven’t given up hope yet. If I could do this by myself that would be great! Especially with the battery in the trunk so I wouldn’t have to run any bulky gauge wire for the amp through the car, only the remote wire.
You are correct, I just discovered the fiber-optics goes through the CD-changer to the factory amp. This puts a little snag in my current plans but I still plan to figure something out. Please update me if you have any success with the upgrade.
Was thinking about bypassing the factory amp and adding an aftermarket 4 channel amp to the interior speakers to bypass factory amp. Either this wknd or the next I will check on the dash kit. Will let you know.
I’ll be interested to hear how that goes. It sounds like you know much more than I do about wiring up car audio than me. I purchased the s-type dash kit but I haven’t test fit it or anything.
What would be really nice is if there was an adapter to utilize the fiber-optics connections in the aftermarket but obviously that’s easier said than done.
Sorry its been so long since I have responded bud. I have been really really busy and just now able to get around to the car. I’m looking at the Pioneer AVH-4800BS and a Kenwood model. As soon as I get a free weekend I will attempt to tackle this job. I looked in my trunk and I might be lucky as I don’t see a factory amp.
hey lorenzo did u manage to bypass the amp ….please let me know thanks..
Not yet, but I don’t have an actual speaker in the trunk. I think the person I bought it from was having problems with it and took it out of the trunk. I’m also going with 2-10s in the trunk so my factory amp wouldn’t need to be on anyway. The metra s type wiring harness will work though, I came across a thread on it in one of the jaguar forums.
Finally finished! It works with the factory amp!!! Don’t know how to upload photos smh…My oldest daughter and I made a template out of cardboard for the ends then cut out the ends from hard foam board(trust me, it is definitely hard enough for an object that doesn’t move. Please tell me how to upload photos and I will write up a detailed “How to” on this.
FYI: the fiber Optics is only used for the navigation and the factory phone with Bluetooth on mines.
That is great news, Lorenzo! Congrats on getting that finished. I’d love to see the photos. I’ll figure out how to enable photo uploads in comments on here and let you know when I have it working. Impressive work!
OK, let me know. If all else fails, I can send it to your personal email and you can post it here.
Allowing images is not proving to be as easy as I’d hoped, I’ve tried several different options but none seem to work. If you want to email me the info to jkent@aftermarketgarage.com I’ll get it added. I’m excited to see what you’ve done, it might give hope for our XJ yet!
I’m sending the procedures now. You can edit it as needed if it is to big of a file to upload onto the site.
Thank you, Lorenzo, I will check these out and get them added to the site ASAP!
Would love more updates and pics. Did Any dash kits work properly? Which is the correct wire harness? Did the amp need to be bypassed or did you wire direct like any other car, or did you use RCA connections? Side note, when I click on the pics above to get a better look, they do not enlarge. My car is a 2006 XJ8 non nav unit.
Hi Aaron, I just posted Lorenzo’s write-up, hopefully it will answer your questions. I plan to give it a go with the information he’s provided and I’ll add more details once I do.
Oh, also, about the pictures, I tested on a couple of devices and it is working okay for me, can you let me know what type of device you are using and I will check it out.
I was using chrome with a pop-up blocker. Turned off the blocker and pics popped up perfectly. Not sure why I didn’t think of that before.
Here is the link to the write-up provided by Lorenzo! Thank you for your efforts on this, it looks great! I’m motivated again now to get this done with our XJ8.
http://aftermarketgarage.com/2005-jaguar-xj8-radio-installation/
Thanks Jason! I’m a published writer now lol. It took about 2 days total due to having to do the paint over, but it was worth it. Now my kids cant tease me about having an ugly radio lol. Hope the write up helps and if you need any other info don’t hesitate to ask. Looking forward to seeing your finished product!
Lorenzo, excellent write up. Just wondering why you installed the supplied pioneer mic, rather than using the stock Jag mic. Was there no available connection. Would love to know more about your wiring. Was it as straight forward as it looks? I was thinking I would use the 4v preout’s modified to adapt to the stock wiring to feed the amp. I love Pioneer headunits myself, have one in my Nissan truck, but am Considering an Alpine for my XJ8 project, mostly because I have OCD and the door speaker covers have the alpine logo on them, and I figgure I could re-ty-in the OEM cd changer.
Thanks Aaron. I used the pioneer mic because it was easier than trying to figure out which wire is for the mic and then I might not even be able to use it because the radio input for the mic takes an aux plug and doesn’t use wires. It was easier after I figured out which ground to use as the other ground is for the stereo controls and the orange wire going to the range/white wire for dimming the radio with the lights. The good thing about the car amp is that it goes from the wire harness to the amp and then to the speakers instead of through the fiber optics cable. Your way might work, but I went for the simplest way. Also I believe the CD changer runs off the fiber optics cable like the telephone/navi (if equipped). You can try it out though, who knows it might work. The whole reason to update the stereo is so that it has everything a 2016 car would have. With options like spotify, bluetooth, and pandora it wasn’t a need for the cd changer and plus the quality of sound is updated with the apps over cd’s. You can also download albums to your phone and play them through the bluetooth option. If you need anything else, feel free to ask away.
I hooked up everything to the quick connect harnes but I get no voice how u get the amp to work
jr, do you have the radio with screen or just the basic radio? Also, what brand of harness and what radio are you using?